Building a Mid-Century Living Room Cabinet That Actually Hides a Noisy Homelab
 Pedro Arian Viena··Updated May 12, 2026·26 min read
Project Specifications & Materials
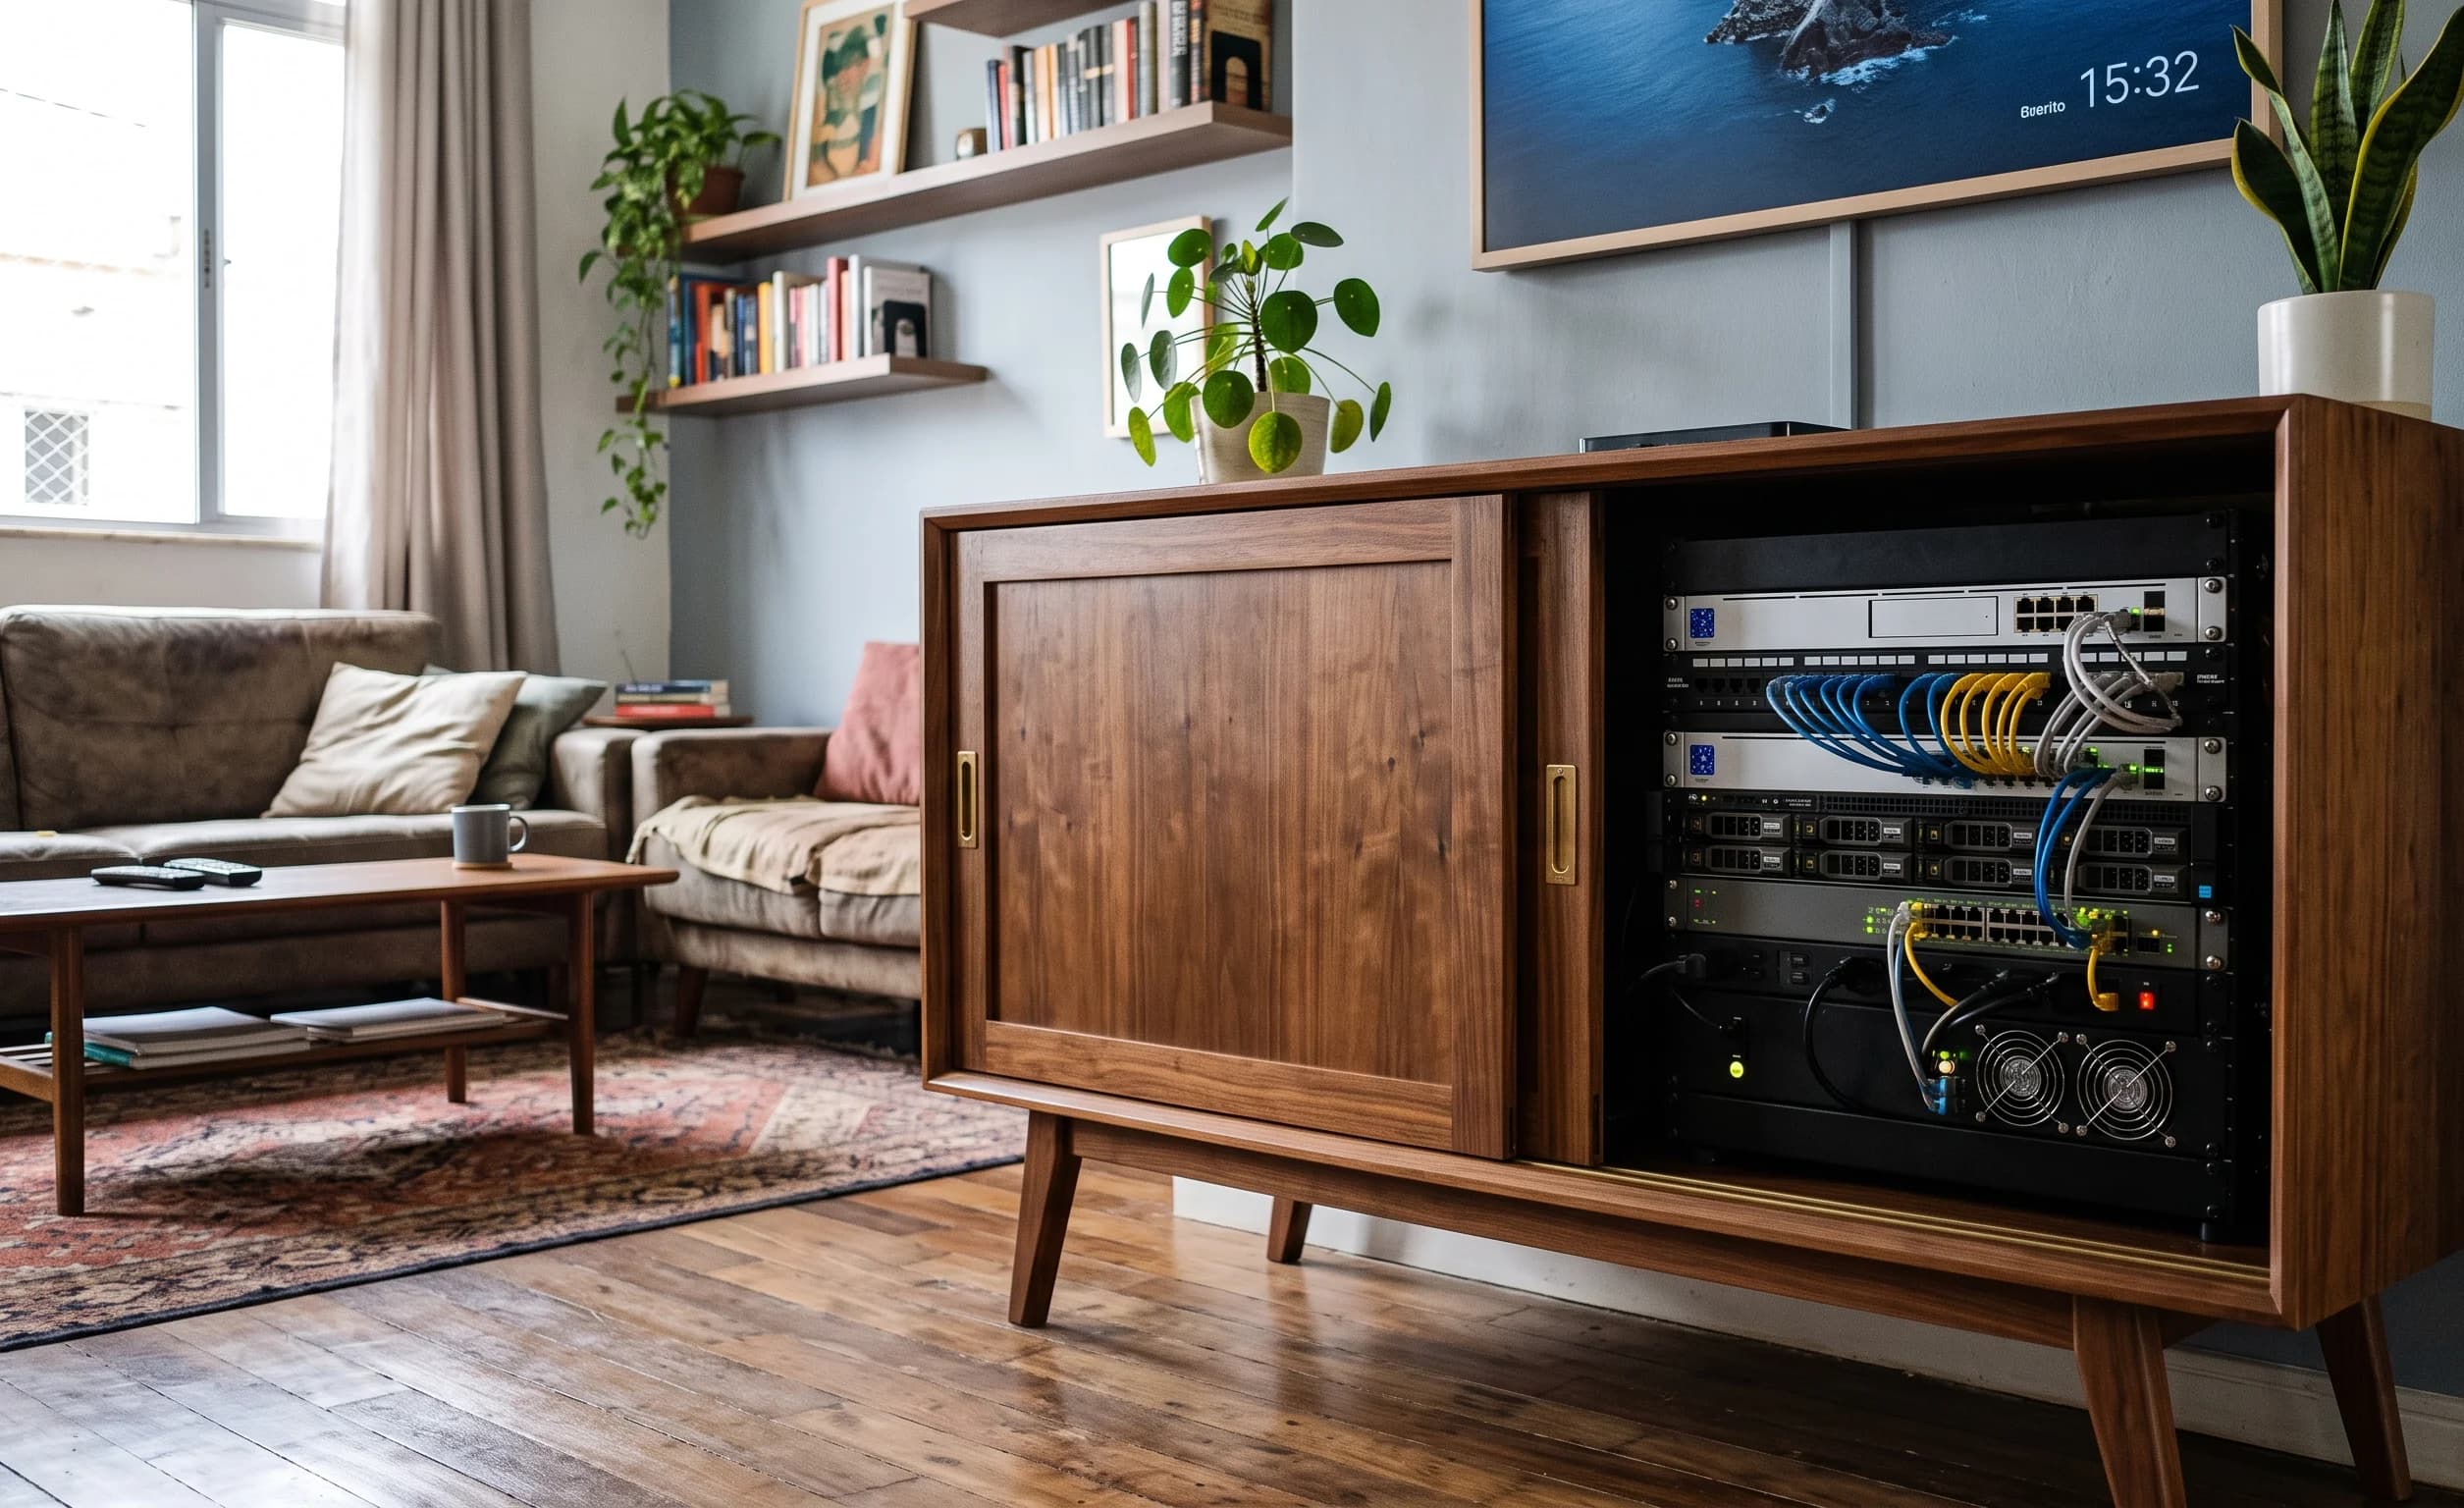
Why I Built Furniture Around My Server Instead of Hiding My Furniture Around My Server There is a moment every technology enthusiast eventually reaches. You start with one small device. Maybe a Raspberry Pi. Maybe a simple NAS. Maybe a small home server sitting quietly beside your desk. Then, slowly, it grows. A larger storage drive. A second machine. A backup system. A router upgrade. A smart home controller. Suddenly, the "small experiment" has become an entire infrastructure sitting somewhere in your house. Mine ended up in the worst possible location. The living room. Technically, it worked perfectly. The network was stable. The storage was fast. Everything was available whenever I needed it. The problem was that my living room started looking like a server closet. Black electronics. Visible cables. Blinking LEDs. Constant fan noise. It was the exact opposite of the calm, warm environment I wanted the room to have. I had built a great homelab. I had also accidentally built the ugliest piece of furniture in my house.
The Problem With Most Homelab Setups
The internet is full of excellent advice about building servers. People discuss:
- CPU performance.
- Storage redundancy.
- Network speeds.
- Virtualization.
- Power efficiency. All important topics. But there is one problem nobody talks about enough. Where does this equipment actually live? A server rack makes sense in a basement. A garage. A dedicated office. But many people don't have those spaces. A lot of home labs end up wherever there is room. A bedroom corner. Under a desk. Inside a closet. Behind a television. The technology works. The environment suffers. I didn't want my living room to look like a data center. I wanted the benefits of a homelab without sacrificing the feeling of the room. That was the real design challenge.
Why I Didn't Just Buy a Server Cabinet
The obvious solution was buying a small rack cabinet. Problem solved. Except it wasn't. Most rack cabinets are designed for one purpose: Holding equipment. They are not designed to look like furniture. They are usually:
- Black metal.
- Industrial looking.
- Full of vents.
- Covered with exposed hardware. Functionally excellent. Visually terrible. A living room has different requirements. Furniture has to work with the space. It needs warmth. Texture. Proportion. The solution couldn't simply be "put the server somewhere else." The solution was making the server become part of the room.
The Mid-Century Inspiration
I have always liked mid-century furniture because it solves a problem that modern technology often creates. It hides complexity. Older furniture was designed around the idea that objects should have a place. Radios. Record players. Televisions. Speakers. Everything had a home. Modern electronics moved in the opposite direction. Thin screens. Wireless devices. Minimal surfaces. But behind the scenes, the complexity increased. A modern living room might look clean while hiding dozens of cables and connected devices. I wanted to bring back that old idea: A piece of furniture designed specifically around what it needs to contain.
The First Design Mistake I Almost Made
My first idea was simple. Build a beautiful wooden cabinet. Put the server inside. Done. Then I thought about it for about ten minutes. A wooden box full of computers is basically an oven. Servers create heat. Storage drives create heat. Power supplies create heat. Enclosing them without proper airflow would create a completely different problem. The cabinet would look beautiful. The hardware would slowly cook itself. That was the moment I realized this was not just a woodworking project. It was an airflow engineering problem.
The Hidden Engineering Behind the Cabinet
The final design needed to solve three problems simultaneously:
- Hide the Equipment The server, NAS, router, and cables needed to disappear visually. Nobody sitting on the couch should feel like they are sitting next to networking equipment.
- Control Noise Small fans spinning constantly create an annoying background sound. The goal was not just reducing volume. It was reducing unnecessary noise.
- Manage Heat Automatically The cabinet couldn't depend on me remembering to check temperatures. If the hardware got warm, the cooling system needed to react automatically. This is where the interesting part started.
The Idea: A Smart Furniture System
Instead of leaving fans running 24/7, I wanted the cabinet to behave intelligently. The idea was simple: A temperature sensor monitors the inside of the cabinet. An ESP32 microcontroller reads the temperature. When the equipment stays cool, the fans remain off or run slowly. When temperatures rise, the fans automatically increase airflow. Basically, a miniature version of the cooling logic used inside computers. Except hidden inside furniture.
Why I Chose Quiet Fans Instead of More Fans
My first instinct was adding more ventilation. More fans. More airflow. More cooling. That is how many people approach server cooling. The problem? More fans usually means more noise. The better approach is efficient airflow. A properly designed path with fewer high-quality fans can outperform several cheap fans running constantly. The goal was: Fresh air enters. Hot air leaves. The path is controlled. Noise stays low. This is exactly the same principle used in well-designed PC cases.
The Cabinet Became the Interesting Part of the Homelab
The funny thing is that the server hardware itself was no longer the most interesting part. The furniture around it became the engineering project. Wood selection. Door design. Vent placement. Temperature control. Cable routing. Acoustic management. The cabinet became the bridge between two worlds that usually don't mix: Technology and interior design. And that was exactly what I wanted.
Before Cutting Any Wood... The biggest lesson from this project was simple: Don't build the furniture first and figure out the technology afterward. The hardware determines the furniture. The server size. The airflow requirements. The cable locations. The maintenance access. Everything starts with understanding what the cabinet needs to support. Once I knew the thermal requirements, the woodworking decisions became much easier. The next stage was designing the actual cabinet structure: creating airflow channels, choosing the right materials, planning the slatted doors, and figuring out how to cool a silent living room without turning it into a server room. Designing the Cabinet Around Airflow: The Engineering Behind a Silent Homelab The biggest mistake I see people make when hiding electronics inside furniture is treating ventilation as an afterthought. They build the cabinet first. Then they realize the equipment gets hot. Then they start drilling random holes into the back, adding noisy fans, and hoping for the best. That approach usually creates a cabinet that looks good but performs poorly. I wanted to avoid that. The cooling system had to be part of the design from the beginning. Not something added after the woodworking was already finished. The furniture and the electronics needed to be designed as one system.
Understanding Airflow Before Building Anything
Cooling a server cabinet is actually simpler than many people think. You are not trying to create a refrigerator. You are trying to move warm air away from heat-producing components. Every electronic device inside the cabinet follows the same basic pattern: Cooler air enters. Components heat the air. Warmer air leaves. The challenge is controlling that movement. If air enters and immediately escapes without passing through the equipment, the cooling is inefficient. If hot air has nowhere to go, temperatures slowly climb. The cabinet needs a deliberate path.
The Airflow Design I Chose
For my cabinet, I designed the airflow similar to a computer case. Cool air enters from the lower section. The equipment sits in the middle. Warm air exits through the upper rear area. This uses natural convection as well as fan assistance. Hot air naturally rises. The fans simply help guide that movement. This is much quieter than forcing air randomly around the cabinet. The goal was not maximum airflow. The goal was controlled airflow. Those are different things.
Why the Back of the Cabinet Matters More Than the Front
The front of the cabinet is what everyone sees. That makes it tempting to focus all the design attention there. Beautiful wood. Perfect proportions. Elegant doors. But the back is where the engineering happens. The rear panel needed to handle:
- Power cables.
- Ethernet cables.
- Fan mounting.
- Air exhaust.
- Future upgrades. I treated the back of the cabinet almost like a computer chassis. Nobody sees it. But it determines whether everything works.
Creating an Invisible Exhaust System
The hardest part was removing hot air without making the cabinet look like a server enclosure. A normal server rack has obvious ventilation. Large mesh panels. Industrial vents. Visible fans. That was exactly what I didn't want. The solution was hiding the exhaust path. The upper rear section of the cabinet contains the extraction fans. From the outside, they are invisible. From inside, they create a constant flow of warm air away from the equipment. The furniture still looks like furniture. The electronics still get proper cooling. That balance was the entire point of the project.
Why I Used Noctua Fans
For this type of project, the fan choice matters more than people expect. A cheap fan can move air. But it usually does it with noise. The problem is not only the volume. It's the quality of the sound. A constant low-quality fan noise becomes extremely noticeable in a quiet living room. I chose Noctua fans because they are designed around efficiency and low acoustic output. They are not the cheapest option. But this cabinet was literally sitting in the room where I relax. Saving a few dollars on fans would have been the wrong decision. A silent system is worth more than a slightly cheaper one.
The Fan Placement Mistake I Almost Made
My first design placed the fans directly behind the server. It seemed logical. Put the cooling exactly where the heat is generated. But after thinking about the airflow path, I realized that was not ideal. The fan would immediately pull air from the closest area instead of creating movement throughout the cabinet. The better solution was creating pressure differences. Intake low. Exhaust high. Equipment between them. The entire cabinet becomes part of the cooling system.
Designing the Slatted Doors
The front doors were one of the most important design decisions. They needed to accomplish three things:
- Match the mid-century style.
- Allow enough airflow.
- Hide the electronics. A solid wooden door would look beautiful. It would also restrict airflow. The answer was a slatted door design. The vertical wooden slats create the visual style I wanted while leaving controlled openings for air movement. This is where aesthetics and engineering finally worked together. The feature that makes the cabinet look better also helps it function better.
Calculating the Ventilation Area
This is where I moved away from pure woodworking. Airflow needs space. A few decorative gaps are not necessarily enough. The opening area needs to match the amount of air the equipment requires. The exact calculation depends on:
- Hardware power consumption.
- Internal volume.
- Fan performance.
- Room temperature. But the principle is simple: The cabinet needs enough opening area that the fans are moving air, not fighting resistance. A powerful fan behind a tiny opening is not an efficient cooling system. It is just a louder cooling system.
The Hidden Temperature Monitoring System
This was the part that made the project feel different from a normal cabinet. I didn't want manual control. I didn't want to open an app every day and check temperatures. The cabinet needed to think for itself. The solution was a small ESP32-based monitoring system. The ESP32 reads temperature sensors placed near the hottest components. The logic is simple: Cool cabinet: Fans stay quiet. Temperature increases: Fans increase speed. Temperature returns to normal: Fans slow down. The system only works harder when necessary.
Why an ESP32 Instead of a Commercial Controller?
There are plenty of ready-made fan controllers. Some are excellent. But the ESP32 gave me something important: Flexibility. I could customize the behavior. I could monitor temperatures. I could eventually connect it to my smart home system. I could create alerts if something unusual happened. The hardware itself is inexpensive. The interesting part is the control logic.
Sensor Placement Matters
A temperature sensor in the wrong place gives you useless information. I initially placed one sensor too close to the exhaust fan. The reading looked great. The cabinet appeared cool. The problem? It was measuring the air leaving the cabinet, not the temperature around the equipment. I moved the sensor closer to the server and storage drives. The readings immediately became more realistic. This is a small detail, but it demonstrates an important engineering principle: A sensor is only as useful as its location.
Planning Maintenance Access
This is something I almost ignored. A hidden server cabinet looks great until you need to work on the equipment. Servers require maintenance. Drives fail. Cables change. Hardware gets upgraded. The cabinet needed to make those tasks easy. I included:
- Removable rear access panels.
- Organized cable paths.
- Enough internal clearance.
- Easy fan replacement. A beautiful system that is impossible to maintain is a bad design.
The Balance Between Silence and Cooling
This was the main engineering challenge. Maximum cooling is easy. Just run everything faster. Maximum silence is easy. Turn everything off. The difficult part is finding the middle. The cabinet needed to disappear into the room acoustically while protecting expensive hardware. That meant accepting something important: The fans do not need to run constantly. They only need to run when the system needs them. That single idea improved both temperature and noise.
The Moment I Knew the Design Was Correct
Before finishing the woodwork, I tested the electronics inside the unfinished cabinet. It looked terrible. Exposed plywood. Temporary cables. Visible components. But functionally, it was the most important test. I ran the server under normal workload. I monitored temperatures. I listened. The equipment stayed cool. The fans barely made a sound. That was the moment the project stopped being an idea. The engineering worked. Everything else was just making it beautiful.
The next stage was transforming the structure into an actual piece of mid-century furniture: building the wooden cabinet, creating the slatted doors, integrating the hidden electronics, and installing the smart cooling system without compromising the design. Building the Cabinet, Making the Slatted Doors, and Integrating the Smart Cooling System There is a strange moment in projects like this where the two worlds finally meet. For weeks, I was thinking like an engineer. Airflow. Temperature. Fan curves. Cable management. Component placement. Then the woodworking started, and the priorities changed. Suddenly, I was thinking about grain direction, joinery, finish, and whether a tiny gap between two pieces of wood would bother me forever. That is what makes this type of project interesting. A server cabinet can function perfectly and still feel wrong in a living room. A beautiful cabinet can look incredible and quietly destroy the hardware inside. The goal was finding the point where both sides worked together.
Choosing the Wood for a Technology-Focused Cabinet
For a piece of furniture that sits permanently in a living room, material choice matters. This was not a workshop cabinet. It was not something hidden in a corner. People would see it every day. I wanted something that felt warm and timeless. The same reason mid-century furniture continues to look good decades later. I considered several options:
- Walnut for a darker, premium appearance.
- White oak for a lighter modern style.
- Ash for a balance between cost and character. In the end, I chose a material that matched the room rather than simply choosing the most expensive wood available. That is an important distinction. Good furniture should belong to its environment.
Building Around the Hardware Dimensions
This was different from building normal furniture. Usually, you design a cabinet around human needs. Shelf height. Storage space. Visual proportions. Here, the equipment came first. The server determined the internal dimensions. The cooling system determined the ventilation space. The cables determined the rear access. The cabinet was essentially a custom enclosure for a machine. The wood was the beautiful exterior layer. That changed how I approached the entire build.
The Internal Structure Came Before the Appearance
One temptation during furniture projects is focusing on what people see first. The front. The doors. The finish. But the inside of this cabinet was the foundation. Before thinking about aesthetics, I built the internal framework. The structure needed to support:
- Server equipment.
- Network hardware.
- Power distribution.
- Cooling components.
- Future upgrades. I also left more empty space than I initially thought I needed. That felt wasteful during construction. It turned out to be one of the smartest decisions. Technology expands. A cabinet designed with zero extra room becomes outdated quickly.
Creating the Slatted Doors
The doors were probably the most important visual element. They had to hide everything without making the cabinet feel like a box. Solid doors were immediately eliminated. They looked beautiful. They also trapped heat. The slatted design solved both problems. The wooden strips created the mid-century appearance I wanted while allowing air to move naturally through the front of the cabinet. The interesting part was balancing the spacing. Too small? The cabinet looks solid but airflow suffers. Too large? The furniture starts looking industrial. The goal was finding the point where ventilation existed without becoming visually obvious.
The Door Construction Was More Difficult Than Expected
Small furniture details are often harder than large structural parts. The doors exposed every mistake. A cabinet body can hide small imperfections. A door cannot. If one slat is slightly misaligned, your eyes immediately notice. I built a simple spacing jig to keep every gap consistent. This was one of those situations where creating a tool took longer than doing the work manually. But the result was worth it. Consistency creates the feeling of quality.
Adding Hidden Hinges and Maintaining the Clean Look
Visible hardware would have changed the entire style. The cabinet was supposed to feel like a piece of furniture, not equipment storage. I used concealed hinges to keep the exterior clean. The goal was that someone walking into the room would see: A wooden cabinet. Not: A server enclosure disguised as furniture. That distinction mattered. The technology needed to disappear.
Installing the Fan System
Once the cabinet structure was complete, I installed the cooling hardware. The fans were mounted in the upper rear section where they could remove warm air efficiently. I added vibration isolation between the fans and the cabinet structure. This is a small detail that makes a huge difference. A silent fan attached directly to thin wood can still create annoying vibration. The sound does not always come from the motor. Sometimes it comes from the structure amplifying the vibration. Rubber mounts solved this problem.
The Fan Controller Setup
The ESP32 system was installed inside a small protected electronics compartment. I didn't want the controller floating around next to network equipment. The system included:
- ESP32 board.
- Temperature sensors.
- Fan control circuit.
- Power management. The logic was intentionally simple. The cabinet does not need complicated automation. It only needs to make good decisions. Temperature below the threshold: Keep fans slow. Temperature rises: Increase airflow. Temperature returns: Reduce speed. Simple systems are usually easier to maintain.
Creating a Better Fan Curve
The first version worked. But it was annoying. The fans would speed up too quickly when temperatures changed slightly. The result was constant small adjustments. Speed up. Slow down. Speed up again. The hardware was safe. The experience was not great. I adjusted the fan curve with a delay and temperature range. The fans now respond gradually. This is similar to how modern computers manage cooling. The goal is stability, not constant reaction.
Cable Management Inside the Cabinet
This was another area where I refused to compromise. A hidden cabinet with messy cables is still messy. The entire point was creating a clean system. I separated:
- Power cables.
- Network cables.
- Sensor wires.
- Fan cables. I also labeled everything. It feels unnecessary when installing. It becomes incredibly useful six months later when something needs changing. Future maintenance is part of good design.
The First Real Test With Everything Installed
Before moving the cabinet into the living room, I tested everything together. The server. The fans. The temperature sensors. The doors. The airflow. The results were better than expected. The equipment remained cool. The fans were almost impossible to hear from normal sitting distance. The cabinet itself barely looked like it contained electronics. That was the goal. Not hiding technology because technology is bad. Making technology fit the environment.
The Mistake I Made During Final Assembly
I made one classic woodworking mistake. I underestimated how heavy the finished cabinet would become. The individual components did not feel heavy. The wood. The hardware. The electronics. Separately, everything seemed manageable. Together, it became a serious piece of furniture. Moving it into position required more planning than I expected. This is something worth considering early. A cabinet containing servers is not just furniture. It is furniture plus a computer system. The final weight can surprise you.
Installing It in the Living Room
The final installation was the moment everything came together. The cabinet looked like it belonged there. No flashing LEDs dominating the room. No fan noise. No exposed cables. The network equipment was still doing exactly what it did before. But now it existed quietly in the background. That was the entire purpose of the project. The best technology is often the technology you don't notice.
The next challenge was living with the cabinet over time: seeing how the cooling system performed during hot days, how the wood held up, whether the automation was actually useful, and what I would change if I built a second version. Living With a Hidden Homelab: What Worked, What Failed, and What I Would Build Differently The easiest moment to judge a project like this is the day it is finished. The wood is clean. The cables are organized. The photos look perfect. The room feels transformed. But furniture is not a product photograph. It has to survive daily life. The doors will open hundreds of times. The equipment will run for months. The temperature will change with the seasons. The technology inside will eventually be replaced. That is when you discover whether you built something practical or just something impressive for a weekend. After living with this cabinet, I realized the most valuable part was not the hidden server. It was the fact that the room stopped feeling like it was built around the server.
The Biggest Improvement Was Removing Visual Noise
Before this project, the homelab was always present. Even when I wasn't using it, I could see it. The blinking lights. The cables. The hardware. The small details constantly reminded me that there was unfinished technical equipment sitting in a living space. The cabinet changed that completely. The technology still existed. Actually, there was more technology inside than before. But visually, the room became calmer. That is one of the strange contradictions of good design: Sometimes adding more complexity creates a simpler experience. The cabinet added another layer of engineering so the room could feel less technical.
The Cooling System Was the Part I Was Most Curious About
The woodworking was predictable. Wood behaves like wood. You can measure it. You can plan it. The electronics were different. The real question was whether the automatic cooling system would work reliably over time. The answer was yes, but not exactly how I originally imagined. I thought the fans would constantly adjust throughout the day. In reality, most of the time they barely ran. The cabinet had enough passive airflow that the fans only needed to assist when the equipment was under heavier load. That was an important lesson. The best cooling systems do not work harder. They work smarter.
The Temperature Sensor Taught Me an Important Lesson
The first version of the temperature monitoring system was functional. It measured temperature. It controlled fans. Technically, it worked. But the data taught me something interesting. Temperature alone is not always the best indicator. A server might be slightly warmer but perfectly fine. A sudden temperature increase might indicate something unusual. The system became more useful when I started thinking about trends instead of single numbers. A temperature reading is just a snapshot. A pattern tells a story. That is true for both computers and furniture projects.
The Cabinet Made Me Think Differently About Noise
Before building this, I thought noise reduction meant using quieter fans. That was only part of the solution. Noise comes from several sources:
- Fan motors.
- Air turbulence.
- Vibrations.
- Hard surfaces reflecting sound. The cabinet improved multiple areas at once. The wooden structure absorbed some vibration. The airflow design reduced unnecessary fan speed. The placement moved the equipment farther away from where people sit. The result was not a silent machine. A server running heavy workloads will always create some sound. But it became background noise instead of the main feature of the room.
The Unexpected Benefit: Better Cable Discipline
One thing I didn't expect was how much the cabinet changed my approach to cables. When equipment is visible, you tolerate messy cables because they are part of the technical setup. When everything is hidden, messy cables feel wrong. The cabinet forced me to create a proper infrastructure. Power distribution had a place. Network cables had a path. Future upgrades had room. It became less like a pile of devices and more like a small private data center designed properly.
What I Would Change in Version Two
No project is perfect. If I built another version of this cabinet, I would make several improvements. The first would be creating even easier access to the rear electronics. The current design works. But maintenance is always the moment when you appreciate good access. I would probably add a more modular rear panel system. Something that could be removed quickly without tools. The second improvement would be expanding the smart control system. The ESP32 already works well, but there is room for more intelligence. Things like:
- Logging temperature history.
- Tracking fan runtime.
- Sending alerts.
- Monitoring power consumption. The cabinet could become not just a container, but an information system.
The Mistake I Would Avoid: Designing Too Specifically
This is probably the biggest lesson from the project. Technology changes quickly. Furniture does not. A cabinet built around one exact device can become outdated. A cabinet designed around principles lasts longer. The important things are:
- Enough internal space.
- Flexible cable routing.
- Adjustable shelves.
- Replaceable cooling components. The server inside today may not be the server inside five years from now. Good furniture should survive hardware upgrades.
Would I Recommend Doing This Instead of Buying a Rack?
Not for everyone. A traditional server rack has advantages. It is standardized. It is expandable. It is designed specifically for equipment. If you have a dedicated technical space, a rack is probably the correct choice. But if your technology lives in a shared living area, the equation changes. The environment matters. A home is not a data center. The equipment has to coexist with the way people actually live. That is where custom furniture becomes interesting.
The Cost Reality of a Custom Homelab Cabinet
It is also important to be realistic. This was not the cheapest way to store a server. The wood alone can cost more than a basic metal cabinet. Then there are:
- Hardware.
- Finish.
- Fans.
- Sensors.
- Electronics.
- Time. If the only objective is storing equipment, this project makes no financial sense. But that was never the objective. The goal was creating something that solved a specific lifestyle problem. A piece of furniture that respected both technology and the room around it.
The Difference Between Hiding Technology and Integrating Technology
There is a subtle difference between these two ideas. Hiding technology means you are trying to pretend it doesn't exist. Integrating technology means you accept that it is part of modern life and design around it. This cabinet was not built because servers are ugly. It was built because technology deserves better integration into our homes. We have more connected devices than ever. The answer cannot always be putting everything in a closet. Sometimes the better solution is designing the environment around reality.
Final Thoughts After Living With the Cabinet
Looking back, the most satisfying part of this project is not the ESP32. It is not the fans. It is not even the woodworking. It is the fact that the cabinet solved a problem I had accepted as normal. I thought having a homelab in the living room meant accepting noise and visual clutter. It didn't. It just meant the system needed better design. The cabinet turned a collection of electronics into a piece of furniture. The server still runs. The network is still fast. The storage is still available. But now the room feels like a living space again. And that is what good design should do. It should not force you to choose between function and beauty. It should make both work together. A successful DIY project is not always the one that looks the most impressive. Sometimes it is the one you stop noticing because it quietly makes everything around you better.
About the Author

Pedro Arian Viena
Maker & Furniture Designer
Craftsman and home designer passionate about solid wood joinery, custom furniture fabrication, architectural built-ins, and local smart home automation. I write detailed guides on building beautiful, functional living spaces.