Why I Stopped Buying Smart Bulbs and Hardwired My Own Architectural Lighting
 Pedro Arian Viena··Updated July 2, 2026·26 min read
Project Specifications & Materials
Why I Removed Every Visible LED Strip in My House
There is a point where smart home technology starts creating the exact opposite effect it was supposed to create. The goal is usually making a space feel more comfortable. More modern. More personalized. But sometimes the technology becomes the first thing you notice. That was my experience with LED lighting. At first, I loved the idea. Cheap LED strips. Millions of colors. Smartphone control. Voice commands. It felt like the easiest upgrade possible. A few meters of LED strip could completely change a room. The problem appeared later. After the excitement disappeared. The room started looking less like a carefully designed home and more like a gaming setup from 2012. Bright lines of exposed LEDs. Visible individual light points. Plastic controllers hanging behind furniture. Cables running along walls. The technology worked. The design did not.
The Problem With Most LED Installations
The internet has created a very specific idea of smart lighting. A strip of LEDs attached somewhere visible. Usually behind a desk. Around a television. Along a shelf. The photos look impressive because cameras exaggerate color. In real life, the effect is often much harsher. The LEDs become the decoration instead of the light itself. Good architectural lighting works differently. You do not notice the source. You notice the environment. A room feels warmer. Textures become more visible. Objects look intentional. The light supports the architecture. It does not compete with it. That distinction completely changed how I approached lighting.
The Moment I Realized Smart Bulbs Were Not the Solution
Like many people, I started with smart bulbs. They seemed perfect. No construction. No wiring. No tools. Just replace the bulb and connect the app. For a desk lamp or a temporary setup, they are excellent. But for architectural lighting, I started seeing limitations. The first problem was cost. A complete house using premium smart bulbs becomes expensive very quickly. A few bulbs are affordable. Twenty or thirty bulbs become a serious investment. The second problem was dependency. Many systems rely heavily on proprietary ecosystems. Hubs. Cloud services. Manufacturer applications. Everything works beautifully until something changes. A server goes offline. A company changes its platform. Your internet connection fails. Suddenly, your "smart" lighting becomes less intelligent.
Why I Wanted Local Control
This became the main reason I moved away from traditional smart lighting products. I did not want my lights to ask permission from a server somewhere else. A light switch should work instantly. A local automation should respond immediately. The system should continue working even if the internet connection disappears. That idea led me toward open-source smart home control. Specifically: ESP32 controllers. WLED firmware. Home Assistant. A completely local lighting system.
The Difference Between Decorative Lighting and Architectural Lighting
This was the biggest mindset change. Decorative lighting asks: "How can I make the LED visible?" Architectural lighting asks: "How can I make the room look better?" The second question creates completely different designs. Instead of seeing the LED strip, you see: A floating shelf. A softly illuminated wall. A kitchen countertop with perfect task lighting. A hallway with indirect ambient light. The source disappears. The effect remains.
The First Mistake I Made With LED Strips
My first serious LED installation was exactly what I now avoid. I attached the strip directly under a shelf. It worked. Technically. The room became brighter. But at night, I could see every individual LED point. Hundreds of tiny dots. The light looked cheap. No amount of software adjustment could fix it. The problem was not the controller. It was the physical design. The light source itself was exposed. That was when I started researching proper diffusion.
Why Traditional LED Strips Look Cheap
Most common LED strips use individual LEDs spaced apart on a flexible board. When you look directly at them, you see: LED. Dark gap. LED. Dark gap. LED. Dark gap. Your eyes interpret the pattern immediately. This is acceptable for accent lighting where the strip is hidden. But terrible when the goal is a premium architectural effect. High-end lighting does not show the source. It controls the source. That is where COB and FCOB technology changed everything.
The COB LED Difference
COB stands for Chip On Board. Instead of having clearly separated LED points, the light-emitting components are arranged much closer together. The result is a much more continuous line of light. From normal viewing distance, it appears almost like a traditional light source. No dotted effect. No obvious LED pattern. Just a smooth glow. This small hardware difference completely changes the final appearance.
Why Aluminum Channels Matter
Even COB strips benefit from proper installation. The mistake many people make is treating LED strips as decorations. They attach them anywhere. A professional lighting installation treats them like electrical components. The aluminum channel serves several purposes:
- Provides heat management.
- Protects the strip.
- Holds the diffuser.
- Controls the light direction. The diffuser is especially important. It transforms individual light output into a softer architectural glow.
Designing Lighting Around the Room
The biggest lesson I learned was that lighting should start with the space. Not the LED strip. The room determines: Where shadows should disappear. Where surfaces need emphasis. Where indirect light improves comfort. The technology comes afterward. This is the same principle behind good furniture projects. The object should serve the environment. Not force the environment to adapt to the object.
The Engineering Challenge Behind Beautiful Lighting
Once I decided to build the system properly, the project became less about LEDs and more about engineering. Power management. Heat dissipation. Controller placement. Cable routing. Network reliability. Software integration. The visible result would be simple. A beautiful room. But creating simplicity required complexity behind the scenes. That is usually how good design works.
The Goal: Lighting Nobody Notices
The best compliment for architectural lighting is usually not: "That LED strip looks amazing." It is: "Your room feels different." The light should create atmosphere without announcing itself. That was the reason I stopped buying smart bulbs and started building lighting systems around the architecture of the home. The technology became invisible. The environment became the focus.
The next stage was designing the actual lighting system: choosing FCOB strips, calculating power requirements, selecting aluminum channels, hiding wiring inside walls and furniture, and replacing unreliable smart controllers with a local ESP32-based system running WLED. Designing Real Architectural Lighting With COB LEDs, Aluminum Channels, and Hidden Power The biggest change in my approach to lighting happened when I stopped thinking about LEDs as a product and started thinking about them as a building material. A normal LED strip is something you buy, stick somewhere, and control. Architectural lighting is something you design. The difference sounds small, but it completely changes the process. With decorative lighting, the question is: "Where can I put this strip?" With architectural lighting, the question becomes: "What part of the room should the light reveal?" That shift changed every decision I made afterward.
Starting With the Effect, Not the Hardware
One of the easiest mistakes to make with smart lighting is choosing the technology first. People buy a smart LED strip because it has millions of colors. Then they try to find a place for it. I approached the problem backward. I looked at the room first. Where did it feel flat? Where were there uncomfortable shadows? Which materials deserved more attention? Where could light improve the architecture without becoming the architecture? This immediately eliminated many common LED locations. I did not want glowing lines around everything. I wanted controlled areas of light.
The Three Types of Architectural Lighting I Focused On
Most of the lighting I designed fell into three categories. Indirect Wall Lighting This was the biggest visual improvement. Instead of pointing light directly into the room, the LEDs were hidden so they bounced light off walls and ceilings. The result was softer. Less aggressive. More natural. The light source disappeared. Only the atmosphere remained.
Under-Cabinet Kitchen Lighting
This was where function mattered most. A kitchen can look beautiful during the day and still have terrible lighting at night. Overhead lights create shadows exactly where you are working. A properly positioned LED channel under cabinets solves this problem. The countertop becomes evenly illuminated. The lighting feels built into the kitchen instead of added afterward.
Furniture and Architectural Details
This was the most fun category. Shelves. Wall panels. Floating cabinets. Stair details. These areas benefit from subtle illumination. The goal is not making furniture glow. The goal is creating depth. A small amount of hidden light can completely change how a material feels.
Choosing FCOB Instead of Traditional LED Strips
The first major hardware decision was moving away from standard LED strips. Traditional strips are attractive because they are cheap and easy. But they have a visual limitation. The LEDs are separated. Even with diffusion, you often need more distance between the strip and the surface to hide the pattern. FCOB strips solve much of this problem. The LED chips are distributed much more densely, creating a continuous appearance. The difference is immediately visible. A normal strip says: "There are LEDs here." A good FCOB installation says: "There is light here." That is exactly what I wanted.
Understanding Color Quality Before Buying LEDs
One mistake I see often is choosing LED strips only based on brightness. Brightness is not everything. A cheap LED can be extremely bright and still make a room feel unpleasant. For interior lighting, color quality matters. Important factors include:
- Color temperature.
- Color rendering.
- Consistency between sections.
- Dimming behavior. A living room does not need the same lighting as a workshop. The goal is creating a comfortable environment, not maximizing output.
Choosing the Right Color Temperature
This was one of the details that required more experimentation than expected. A light can technically be "warm white" and still feel wrong. Too cool, and the room feels like an office. Too warm, and everything starts looking yellow. For architectural lighting, the sweet spot depends on the room. Living spaces usually benefit from warmer tones. Work areas may require something more neutral. The important lesson: Do not choose lighting based only on specifications. Test it in the actual space.
Why Aluminum Channels Are Not Optional
A lot of DIY installations skip aluminum channels. The strip gets attached directly to a surface. It works. Until it doesn't. LEDs generate heat. Especially when running at higher brightness. The aluminum channel acts as a heat sink. It helps protect the strip and improves long-term reliability. It also creates a cleaner installation. The diffuser sits perfectly. The light spreads evenly. The final result looks intentional.
Recessed vs Surface-Mounted Channels
There are two main approaches. A surface-mounted channel is easier. You attach it where you want the light. It works well for furniture and existing spaces. A recessed channel requires more planning. The aluminum profile sits inside a cutout or architectural detail. The result is much cleaner. It almost looks like the light is coming from the building itself. For new construction or renovations, recessed channels are worth considering.
The Mistake I Made With My First Channel Installation
I underestimated viewing angles. The installation looked perfect when I was standing directly in front of it. Then I sat down. The angle changed. Suddenly, I could see part of the LED strip. The problem was not the hardware. The problem was placement. Architectural lighting has to be designed from where people actually experience the room. Eye level matters. Furniture height matters. Movement through the space matters. A light that looks perfect in a workshop can look wrong in a home.
Planning Power Before Installing Anything
This is where lighting projects become electrical projects. The LED strip is only one part. You also need to think about:
- Power supply location.
- Cable paths.
- Voltage drop.
- Access for replacement.
- Heat management. The mistake is hiding everything permanently without planning maintenance. A power supply that fails five years later should not require destroying finished walls. Good installations think about the future.
Understanding Voltage Drop
Long LED installations have another technical challenge. Electricity loses voltage as it travels through wires and strips. The result can be:
- Reduced brightness at the end.
- Color inconsistency.
- Uneven performance. The solution depends on the installation. Sometimes a shorter run is enough. Sometimes power needs to be injected at multiple points. This is the kind of detail that separates a professional-looking installation from a cheap-looking one.
Replacing Proprietary Controllers With ESP32 + WLED
The hardware was only half the problem. The other half was control. Many commercial smart LED systems use their own controllers. They work. But they create limitations. I wanted:
- Local control.
- Fast response.
- Home Assistant integration.
- No cloud dependency. That led me to ESP32 controllers running WLED. The setup is surprisingly powerful. A small inexpensive microcontroller becomes the brain of a professional lighting system.
Why WLED Changed the DIY Lighting Game
WLED is one of those projects that shows the power of open-source hardware. It provides:
- Wireless control.
- Effects.
- Brightness management.
- Color adjustment.
- Integration with smart home platforms. But the most important feature is independence. The lights do not need permission from a company's server. They simply work on your local network.
Designing the Controller Placement
Another mistake beginners make is putting the controller wherever it is convenient. That usually means somewhere visible. I treated the controller like electrical infrastructure. It needed:
- Ventilation.
- Easy access.
- Protection.
- Organized wiring. The LEDs are visible. The electronics should disappear. The same philosophy applies to every smart home project. The technology should support the experience. Not become the experience.
The First Complete Prototype
Before committing to permanent installation, I built a prototype. It was not pretty. The wires were visible. The controller was temporary. The LED channel was not installed properly. But it answered the important questions: Was the brightness correct? Was the color comfortable? Was the diffusion good? Was the automation reliable? Testing prevented expensive mistakes later.
The Moment I Realized the System Was Different
When I turned on the prototype at night, the difference was obvious. It did not look like an LED strip. There were no dots. No obvious source. No gamer aesthetic. The room simply looked better. That was the moment the project achieved its original goal. The technology disappeared. The architecture became visible.
The next stage was building the final system: installing the FCOB strips permanently, hiding power and controllers, configuring ESP32 with WLED, connecting everything to Home Assistant, and creating lighting automation that worked locally without depending on the cloud. Building the System: Installing FCOB Strips, ESP32 Controllers, and Local Smart Home Automation There is always a moment in a DIY project where the concept has to survive contact with reality. A drawing can look perfect. A shopping list can look complete. A prototype can work on a workbench. But permanent installation is different. Once the lighting disappears into walls, cabinets, and architectural details, mistakes become much harder to fix. This was the stage where I stopped experimenting and started building the actual system. The goal was simple: Create lighting that looked like it belonged to the house. Not lighting equipment attached to the house.
Installing the Aluminum Channels First
One of the biggest mistakes people make with LED lighting is installing the strip before thinking about the channel. The channel determines everything. The angle of the light. The diffusion. The final appearance. The protection. I installed the aluminum profiles first and treated them like architectural elements. Their position mattered more than the LED strip itself. A few centimeters could completely change the effect. Too close to a wall: The light becomes harsh. Too far: The effect becomes weak. The goal was finding the point where the light spread naturally.
The Difference Between a Good Installation and a Visible LED Strip
This was the moment where I understood why expensive architectural lighting looks different. It is not because the LEDs are necessarily better. It is because the light source is controlled. A visible LED strip creates a statement: "Look at the LEDs." A hidden LED channel creates an effect: "Look at the room." That difference is almost entirely caused by installation. The hardware is only part of the solution. The environment around the hardware determines the result.
Cutting and Fitting the Channels
Installing aluminum channels sounds simple. It is not. Every surface introduces challenges. Walls are rarely perfectly straight. Cabinets have small variations. Furniture dimensions are not always exact. The channel needs to look intentional. Any uneven spacing becomes obvious once the light turns on. I spent more time measuring and adjusting than I expected. This is common with lighting projects. During the day, small imperfections hide. At night, light reveals everything.
Installing the FCOB LED Strips
Once the channels were positioned correctly, the LED strips were installed. The adhesive backing makes installation easy, but I did not rely only on it. Over time, heat and environmental changes can weaken adhesives. For permanent installations, preparation matters. The surface needs to be:
- Clean.
- Dry.
- Free of dust.
- Properly aligned. Small details during installation prevent future failures.
Managing Heat Behind the Scenes
Even efficient LED systems create heat. It is less dramatic than traditional lighting, but it still matters. Especially when strips are installed inside furniture or enclosed areas. The aluminum channel helps, but the entire design needs to consider heat. A common mistake is hiding everything in tight spaces because the lighting looks cleaner. The problem appears months later. The LEDs become less efficient. The adhesive weakens. The components age faster. A hidden system still needs room to breathe.
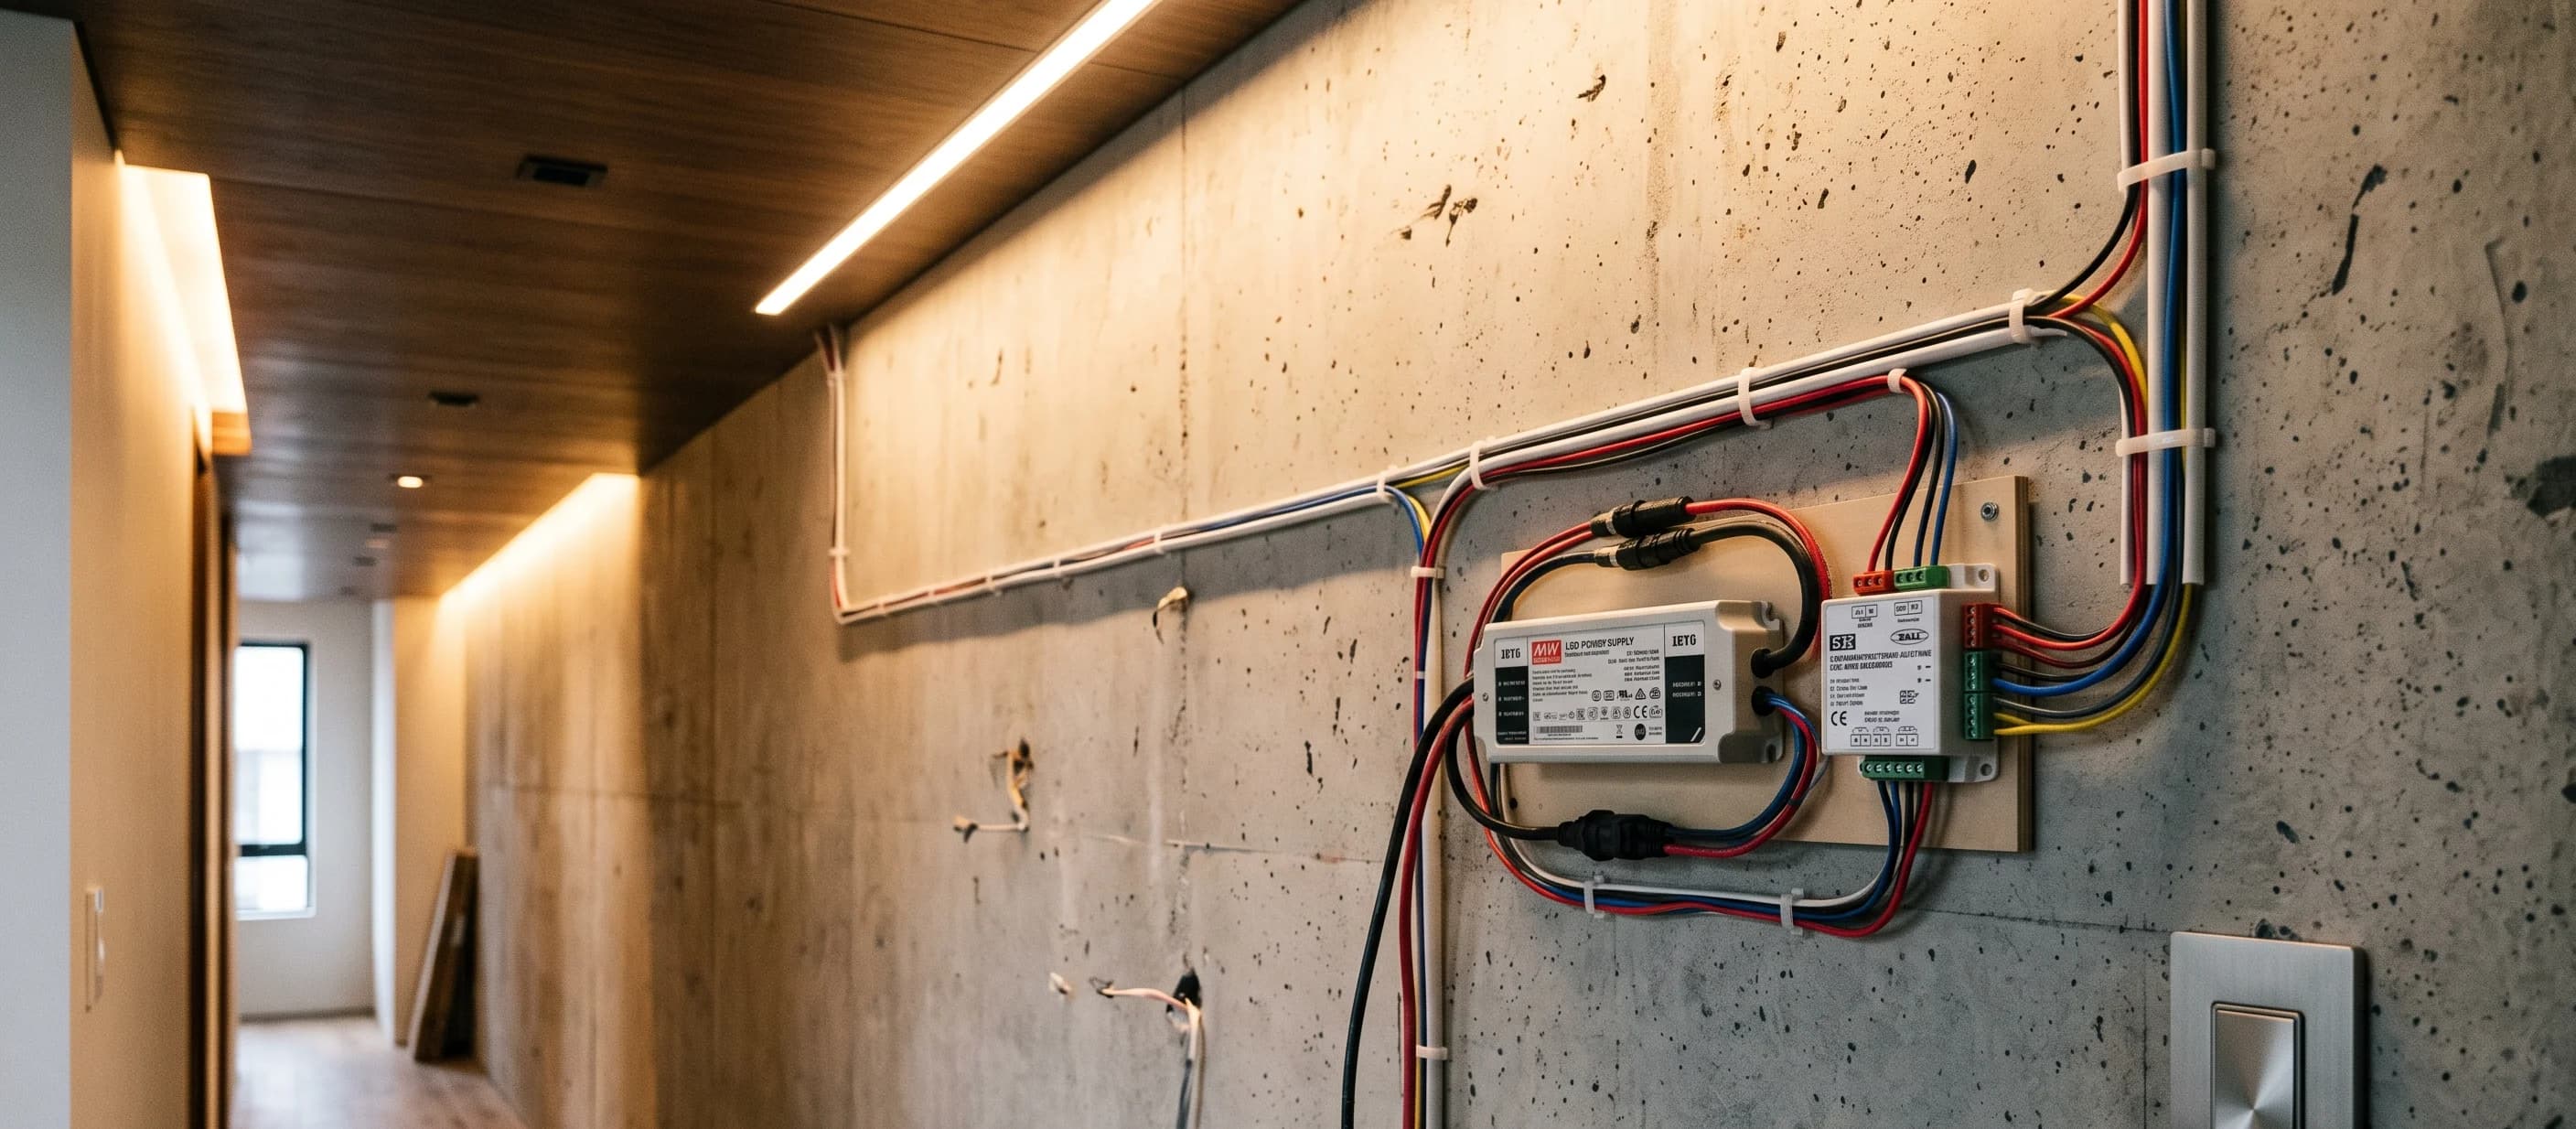
Power Supply Placement
The power supply was one of the least exciting parts of the project. It was also one of the most important. A beautiful lighting installation can be ruined by a poorly placed power supply. The solution was treating it like hidden infrastructure. It needed:
- Proper ventilation.
- Safe mounting.
- Easy future access.
- Clean cable routing. Nobody sees the power supply. But it determines whether the entire system remains reliable.
The Mistake I Made With Cable Routing
During the prototype stage, I underestimated how many wires the final system would need. It was not just power. There were:
- LED connections.
- Controller wiring.
- Network components.
- Sensors. The temporary setup looked simple. The permanent version required much more planning. I ended up reorganizing the cable paths before final installation. This was a good reminder: The visible part of a smart home project is usually the easiest part. The invisible infrastructure is where most of the work happens.
Building the ESP32 WLED Controller
The controller was the part where the project became genuinely different from commercial smart lighting. Instead of buying a proprietary controller, I built a local system around an ESP32. The concept is straightforward: The ESP32 receives commands. WLED manages the LEDs. Home Assistant handles automation. The result is a lighting system that behaves like a commercial product but remains completely under local control.
Why Local Control Matters
A lot of people only think about smart lighting when the internet is working. But your home should not become less functional because your internet connection disappears. A light switch should still work. A local automation should still respond. The system should not need to communicate with a distant server just to turn on a light. This was one of the main reasons I chose this approach. The lighting belongs to my home network. Not a company's cloud service.
Connecting WLED to Home Assistant
The integration process was surprisingly smooth. Once the ESP32 was running WLED, Home Assistant could communicate directly with the lighting system. This opened possibilities beyond simple on/off control. The lighting could respond to:
- Time of day.
- Room occupancy.
- Scenes.
- Sensors.
- Other smart home events. But the most important part was maintaining simplicity. Automation should reduce interaction. Not create another hobby that requires constant adjustment.
Creating Lighting Scenes Instead of Controlling Colors
One thing I avoided was treating the lighting like a toy. Technically, RGB lighting gives endless possibilities. Millions of colors. Dynamic effects. Animations. But architectural lighting is usually about atmosphere. The most useful scenes were simple. Morning: Soft, brighter neutral light. Evening: Warmer, lower intensity. Night: Minimal navigation lighting. The system became part of the rhythm of the house.
The Problem With Too Many Smart Features
This is where many DIY smart home projects go wrong. The builder becomes excited by possibilities. Everything becomes automated. Everything becomes connected. Eventually, the system becomes complicated. I learned that a good automation should answer one question: Does this improve the experience? If not, it is probably unnecessary. Technology should simplify life. Not create another thing to manage.
Creating a Backup Manual Control
Even though the system was designed around automation, I wanted manual control. This is something I consider essential. Smart systems fail. Networks restart. Updates happen. Hardware eventually breaks. A good design has a fallback. The room should still function normally even when the smart layer is unavailable.
The First Night With the Complete System
The first evening after everything was installed was the real test. The LEDs were hidden. The channels were finished. The controllers were mounted. The automation was running. I turned off the main lights. The room changed completely. But the interesting part was what I did not see. I did not see: LED dots. Plastic strips. Controllers. Cables. I only saw the effect. A softer room. Better depth. More comfortable light. That was exactly what I wanted.
The Unexpected Lesson From Building It
Before this project, I thought architectural lighting was mainly about better hardware. It is not. It is about removing distractions. The best lighting does not ask for attention. It creates the conditions for everything else in the room to look better. Furniture. Materials. Textures. Architecture. The light becomes invisible. The space becomes more noticeable.
The System Was Finally Complete
At this point, the project had all the pieces working together: FCOB LED strips. Aluminum diffusion channels. Hidden power infrastructure. ESP32 controllers. WLED firmware. Home Assistant automation. Local network control. The final result looked simple. That was the entire point. Creating simplicity required a surprising amount of engineering.
The next stage was living with the system over time: evaluating reliability, energy use, maintenance, how the lighting changed the feeling of the rooms, and why building custom architectural lighting completely changed the way I think about smart home projects. Living With Custom Architectural Lighting: What Worked, What Failed, and Why I Would Never Go Back The interesting thing about building your own lighting system is that the excitement happens before the project is finished. During construction, everything feels important. Choosing the LED strips. Testing controllers. Adjusting brightness. Configuring automations. Watching the first prototype come alive. But after a few months, the technology becomes part of the environment. You stop thinking about the hardware. You stop opening the app just to experiment. You stop showing people how it works. And that is actually the sign that the project succeeded. The lighting became invisible. The room became better.
The Biggest Change Was Not the Smart Features
When I started this project, I thought the biggest improvement would be automation. Being able to control everything from Home Assistant. Creating scenes. Adjusting brightness automatically. Those features are useful. But they were not the reason I kept appreciating the system. The biggest improvement was the quality of the space itself. The room felt calmer. The materials looked better. The architecture became more noticeable. The lighting stopped being an object. It became part of the room. That is the difference between smart lighting and architectural lighting.
Why I Would Never Return to Exposed LED Strips
After living with hidden FCOB lighting, exposed LED strips became almost impossible to tolerate. Not because they are technically bad. They are still useful for certain situations. A temporary setup. A workshop. A hidden area where appearance does not matter. But for a living space, the difference is enormous. An exposed strip creates visual noise. Even when turned off, you know it is there. The plastic backing. The wires. The installation decisions. A properly integrated system removes all of that. You only experience the light.
The Room Changed More Than I Expected
One surprising result was how much the lighting affected materials. Before this project, I thought lighting was mainly about visibility. Making things brighter. I was wrong. Good lighting changes perception. Wood feels warmer. Stone gains more texture. Paint colors become more intentional. Furniture feels more expensive. The objects did not change. The light changed how they were experienced. That was probably the most valuable lesson from the entire project.
The Smart Automation Became Background Infrastructure
The first few weeks were different. I constantly tested everything. Would the scene activate correctly? Would Home Assistant respond? Would the ESP32 reconnect? Would the network connection remain stable? Eventually, I stopped checking. The system simply worked. That is the ideal outcome for home automation. The technology should move from being something you interact with to something that quietly supports you. A good smart home is not one where you constantly control devices. It is one where the devices understand your routine.
The Automation Rules I Actually Kept
During development, I created many different automations. Some were interesting. Some were unnecessary. Some were just experiments. Over time, the useful ones became obvious. The final system was much simpler. Morning: Gradually increase light intensity. Evening: Create warmer, softer lighting. Night: Reduce brightness for comfort. Manual control: Always available. The complicated experiments disappeared. The useful habits remained.
What Failed During Real Use
No project survives real life without problems. The first issue was not the LEDs. It was placement. One section of lighting looked perfect during testing but felt too bright when used every day. The problem was that I evaluated it as a builder. Not as someone living in the room. Builders look directly at the installation. Users experience the entire environment. I reduced the brightness and adjusted the scene. The system immediately felt more natural.
The Brightness Mistake Most People Make
This is something I learned from architectural lighting: More brightness does not always mean better lighting. People often maximize output because they are testing the system. Everything looks impressive. Everything feels powerful. But homes are not showrooms. The best lighting is usually lower than people expect. It creates comfort. It creates atmosphere. It allows your eyes to relax. A room does not need to be brighter. It needs to be better illuminated.
The Long-Term Reliability of ESP32 and WLED
One question I received after building this type of system was: "Why not just buy a commercial product?" It is a fair question. Commercial products have advantages. They are polished. They are easy. They usually include support. But the open-source approach solved a different problem. It gave me control. The ESP32 controllers have been reliable because the system is simple. No unnecessary cloud dependency. No complicated communication path. The lights are on my network. The logic belongs to me.
The Advantage of Local Smart Home Systems
This project reinforced something I already suspected: A smart home should not stop being smart when the internet stops working. Local control changes the relationship with technology. The response is faster. The system is more private. The hardware has a longer useful life. You are not renting access to your own devices. You own the system. That philosophy was one of the main reasons I moved toward Home Assistant.
What I Would Change in Version Two
If I built this system again, I would improve a few things. The first would be planning even more access points. Hidden systems are beautiful. But hidden does not mean inaccessible. Every controller, power supply, and connection should have a future maintenance plan. The second improvement would be creating more modular lighting zones. Instead of designing sections around the current room layout, I would make future expansion easier. Technology changes. Rooms change. Good infrastructure should adapt.
The Biggest Lesson: Light Is Architecture
Before this project, I thought lighting was an accessory. Something added after the furniture. After building this system, I see lighting differently. Light is one of the materials of a room. Just like wood. Stone. Metal. Paint. It shapes how everything else is perceived. The mistake is treating lighting as a device. The better approach is treating it as part of the architecture.
Why Smart Bulbs Were the Wrong Starting Point for Me
Smart bulbs are not bad. They are useful. They solve specific problems. A lamp. A rental apartment. A temporary setup. But they were the wrong foundation for the type of environment I wanted. They are designed around replacing existing lights. I wanted lighting designed around the room. That difference changed everything.
The Final Result After Living With It
Looking back, the most satisfying part of the project is what disappeared. The visible LED strips disappeared. The cheap controllers disappeared. The dependency on external systems disappeared. The room simply became better. At night, the walls have more depth. The furniture feels warmer. The spaces feel intentional. Nobody walks into the room and says: "Your ESP32 controller and WLED firmware are impressive." And that is exactly the point. The technology succeeded because nobody notices it.
Final Thoughts
Building architectural lighting taught me that the best smart home projects are not really about gadgets. They are about solving problems that normal products ignore. A smart bulb solves the problem of controlling a bulb. A custom lighting system solves the problem of creating an environment. Those are completely different goals. The future of smart homes will not be defined by how many devices we add. It will be defined by how well those devices disappear into our lives. The best technology is not the technology that demands attention. It is the technology that quietly makes everything around it better. That was the reason I stopped buying smart bulbs. Not because they stopped working. Because I wanted something more. I wanted the house itself to feel intelligent. And sometimes the smartest design decision is making the technology invisible.
About the Author

Pedro Arian Viena
Maker & Smart Living Craftsman
Craftsman and home designer passionate about solid wood joinery, custom furniture fabrication, architectural built-ins, and local smart home automation. I write detailed guides on building beautiful, functional living spaces.