Why I Built My Own Desk Shelf Instead of Buying Another One
 Pedro Arian Viena··Updated March 2, 2026·26 min read
Project Specifications & Materials
I used to think desk shelves were just another aesthetic trend, the kind of perfectly clean desk photo you see on Pinterest with a wooden shelf floating above a keyboard and a monitor sitting perfectly centered. Everything looks calm in those photos until you actually try to recreate it and realize your reality looks different. Your laptop charger is stretched across the desk, your headphones are lying on top of your keyboard, and random USB cables are slowly multiplying like they have their own survival instinct. That was my situation: functional chaos where everything had a purpose, but nothing had a home. I could work, edit, and write, but every morning started with five minutes of moving things around before I could actually begin. That's when I started looking into desk shelves to create a second level where my constants could live while leaving the main surface clear. Monitor above. Keyboard below. Small accessories hidden underneath. It made perfect sense. The problem? Most commercial desk shelves weren't designed for how I actually work.
Why Most Desk Shelves Didn't Work for Me
I looked at dozens of options. Some were beautiful. Some were ridiculously expensive. Some were basically just a piece of wood with two legs attached. The biggest issue wasn't appearance. It was dimensions. Most shelves seemed designed around one very specific setup:
- One monitor
- Small keyboard
- Minimal accessories
- Almost no cables That wasn't my desk. I use multiple devices throughout the day. Sometimes I'm writing. Sometimes I'm editing. Sometimes I'm switching between a laptop and a desktop setup. I needed something that could adapt. A shelf that looked minimalist but behaved like a tool. That's the difference between buying furniture and building furniture. When you build something yourself, you can design around your actual habits. Not the average customer's habits.
The First Mistake I Made
My first attempt was honestly too ambitious. I found a beautiful piece of walnut and immediately imagined this premium designer desk shelf. I wanted hidden storage. Cable channels. A drawer. A headphone hanger. Maybe even wireless charging. Basically, I was trying to build a tiny piece of office furniture. The problem? I forgot the reason I wanted the shelf in the first place. Less complexity. More simplicity. I spent an entire evening drawing plans for something that would actually make my desk more complicated. That was the moment I deleted the sketches and started over. The best minimalist designs usually come from removing things, not adding them.
The Design Philosophy: Everything Needs a Reason
Before cutting any wood, I made one rule. Every part of the shelf needed a purpose. No decorative features just because they looked cool. No unnecessary mechanisms. No complicated joinery hidden inside a simple object. The shelf needed to solve three problems:
- Raise my monitor to a better height.
- Create storage space underneath.
- Make the desk surface feel calmer. That's it. Once I had those three goals, the design became much easier.
Choosing the Right Wood for a Desk Shelf
This is where many people overcomplicate things. A desk shelf doesn't need to be built like a dining table. It doesn't support hundreds of pounds. It doesn't need massive structural strength. But it is something you'll look at every single day. That changes the priorities. For me, appearance mattered almost as much as durability.
Walnut: The Premium Choice
Walnut is probably the first wood most people imagine when they think about high-end desk accessories. And honestly, I understand why. It looks expensive without trying. The dark color works extremely well with modern setups, black monitors, and minimalist interiors. The grain does most of the decorating. You don't need complicated shapes or fancy details. The wood itself becomes the design. The downside? Price. A good walnut board can cost more than the finished desk shelves you see online.
White Oak: The One I Recommend Most Often
If I were building another shelf today, white oak would probably be my choice. It has almost everything I want:
- Strong
- Stable
- Modern appearance
- Beautiful grain
- Easy finishing It also matches almost any room. A walnut shelf makes a statement. White oak quietly fits. There's a reason so many modern furniture designers use it.
Maple, Ash, and Other Options
Maple works extremely well if you prefer a brighter workspace. It has a clean appearance and a smooth surface. Ash is another underrated option. It looks expensive but usually costs less than walnut. I actually think ash deserves more attention in DIY furniture projects. The grain pattern gives it personality without becoming distracting.
Getting the Dimensions Right
This was the part where I spent the most time measuring. A desk shelf that looks good in photos can feel terrible in daily use. Too tall? Your monitor becomes uncomfortable. Too shallow? Your keyboard feels cramped. Too deep? You lose valuable desk space. For my setup, I found a depth around 9 to 12 inches worked well. It gave enough room for:
- Monitor base
- Speakers
- Small accessories without turning the desk into a second table. Height depends heavily on your monitor. This is where copying someone else's measurements becomes dangerous. Your body is not the same as theirs. Your chair is different. Your monitor is different. Your desk height is different. The best measurement is the one that makes your shoulders relax when you're working.
The Small Detail That Made the Biggest Difference
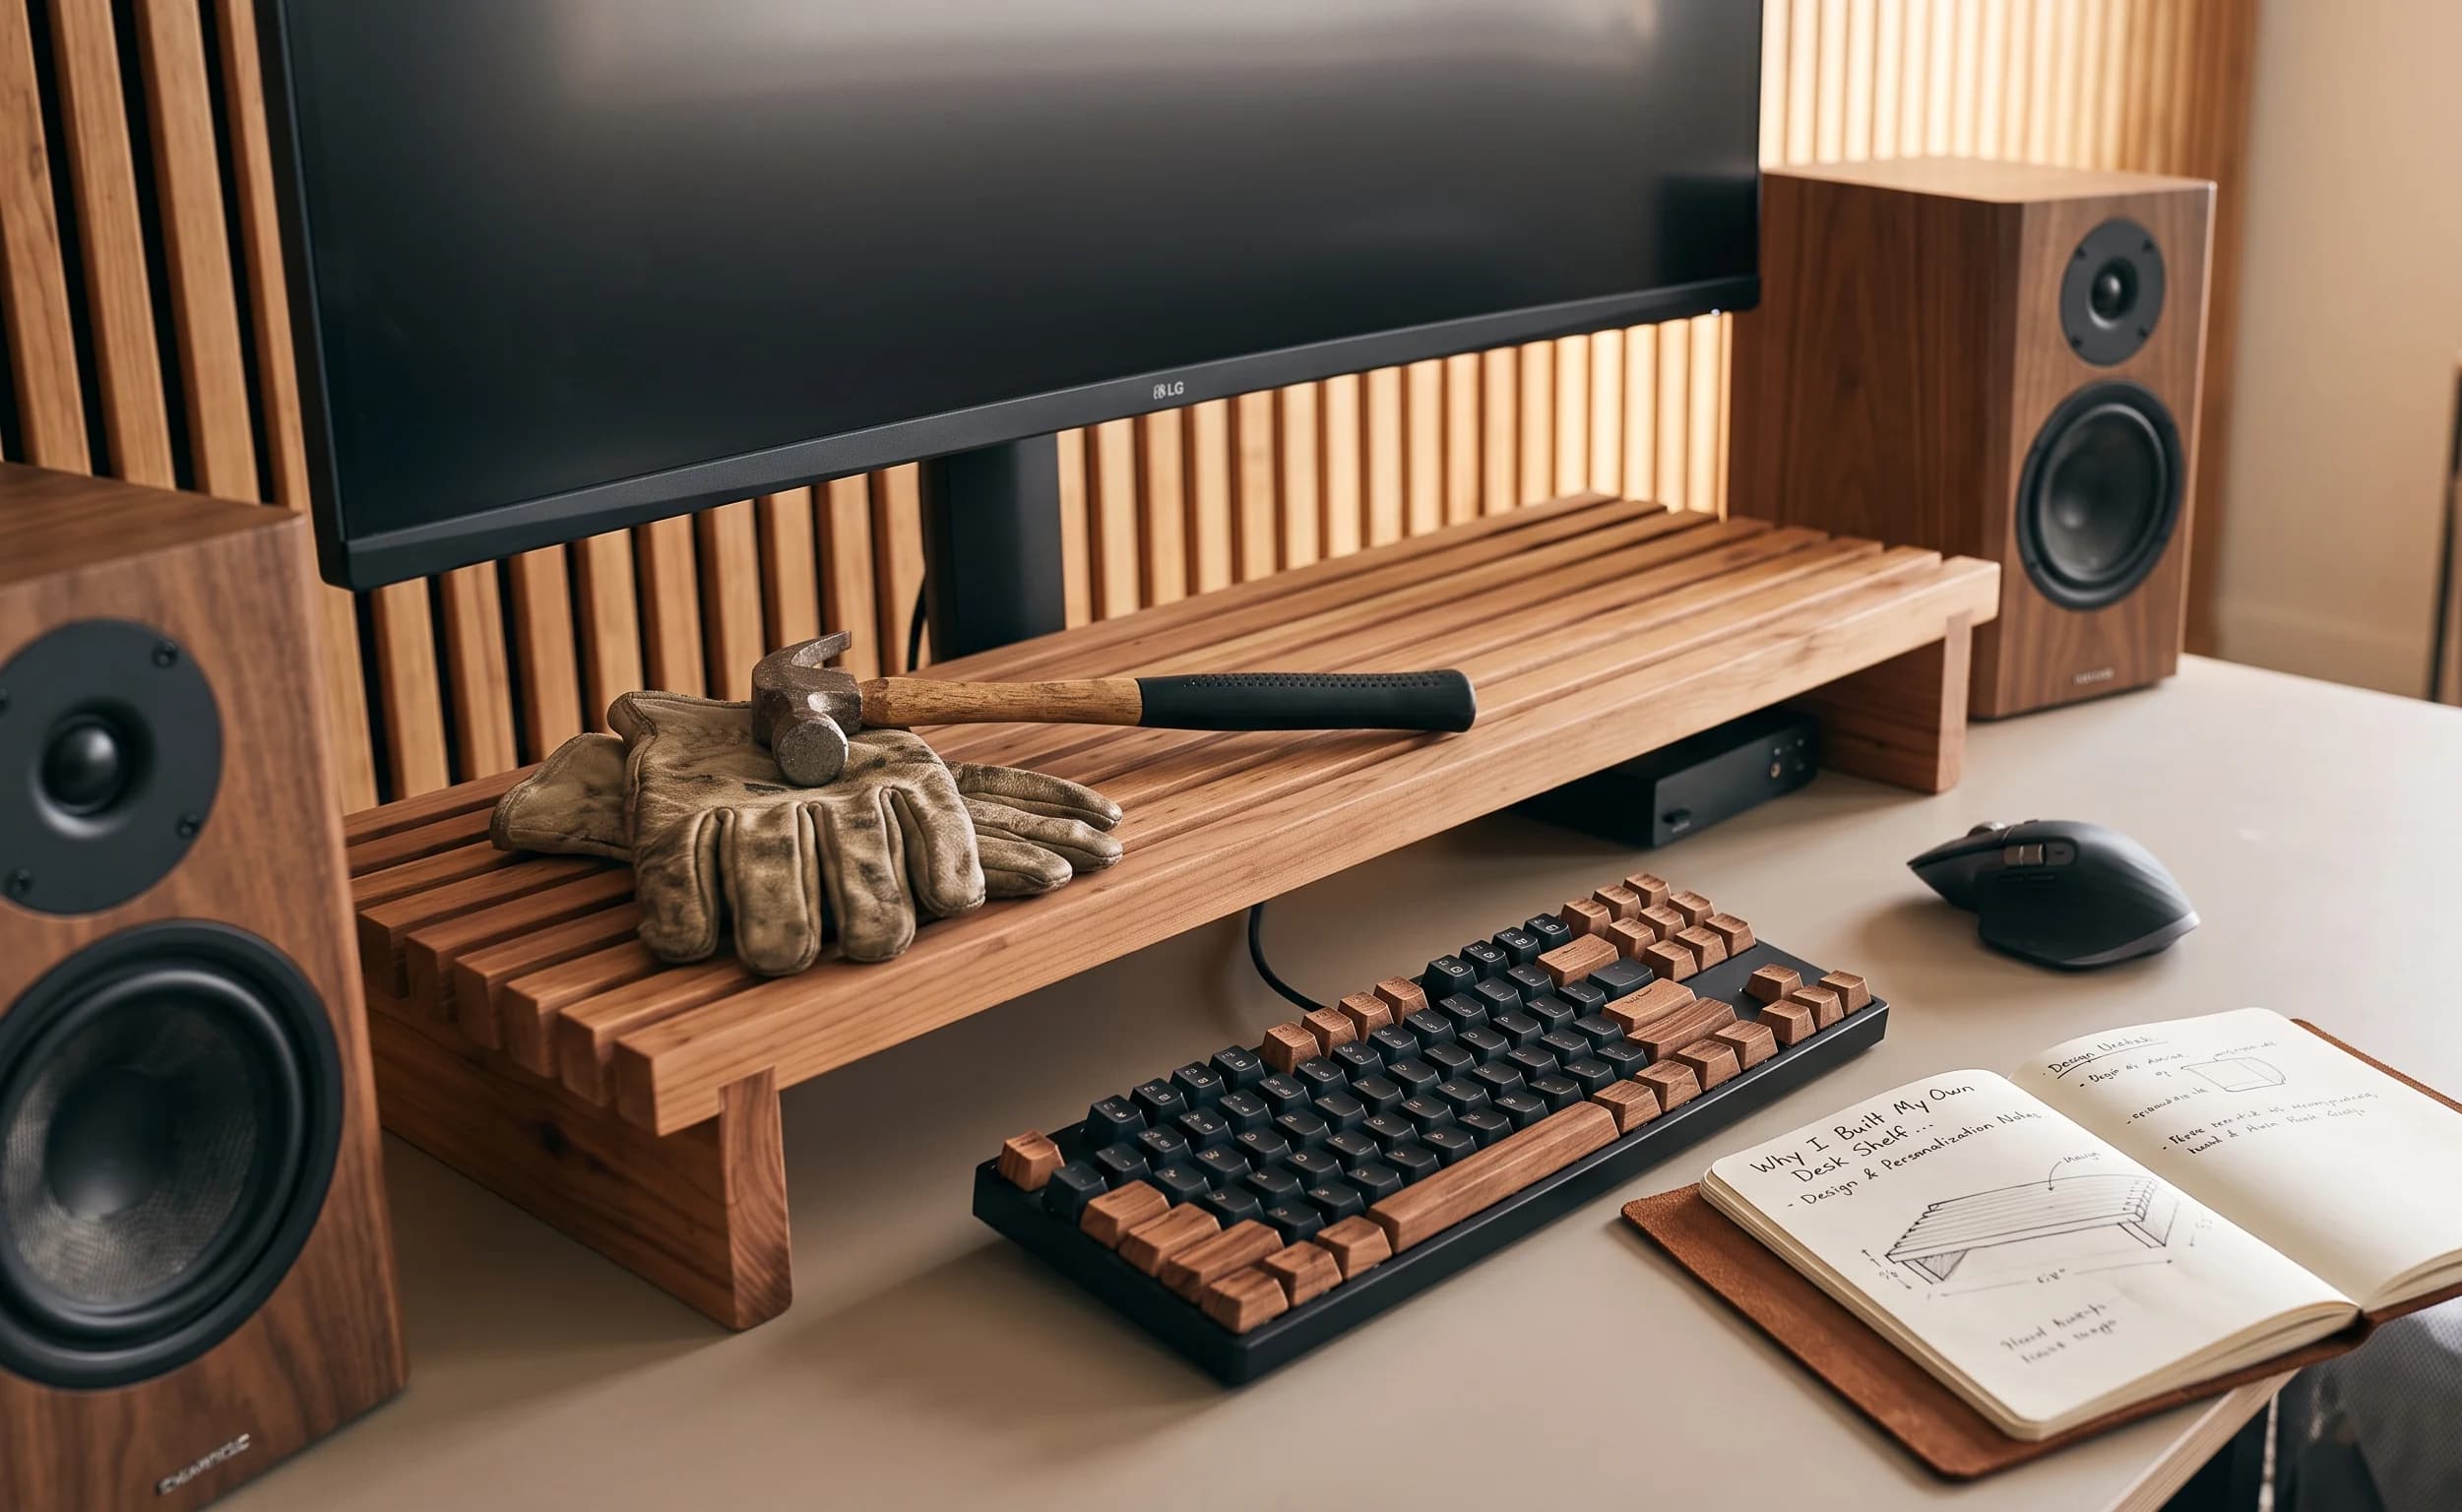
The most important feature I added wasn't the wood. It wasn't the finish. It wasn't even the dimensions. It was a small recessed area underneath. That empty space became the place where everything disappeared. Keyboard when I'm not using it. Notebook. Headphones. Charging cables. Small devices. The shelf didn't just raise my monitor. It created a hidden zone. And that was the entire reason I built it.
Before cutting the first piece of wood, I already understood something important: A good desk shelf isn't really about adding storage. It's about removing visual noise. The less your brain has to process when you sit down, the easier it becomes to focus. That was the idea I wanted this build to achieve. Not a fancy accessory. A quieter workspace. Building the Shelf: Joinery, Hidden Details, and the Mistakes I Almost Made The funny thing about building a desk shelf is that the project looks simple from the outside. It's just a piece of wood sitting on two supports. That's what I thought too. Then I started building it. The simplicity is actually what makes small furniture difficult. With a complicated piece, people expect visible details. Doors, drawers, hardware, moving parts. A desk shelf has nowhere to hide. If the edges aren't clean, you notice. If the proportions are slightly wrong, you notice. If the legs don't align perfectly, you definitely notice. Minimalist furniture is unforgiving because every decision is visible.
Starting With the Wood Preparation
The first thing I did was resist the urge to cut immediately. This is something I learned after ruining more than one project. Beautiful wood creates excitement. You want to start shaping it. You want to see the final piece. Don't. Take the time to understand the material first. Wood moves. Boards that look perfectly straight at the store can reveal twists and bows after you bring them into your workspace. Especially hardwood. I left the boards sitting in my shop for several days before doing anything. This allows the wood to adjust to the environment where it will live. Is this always necessary for a small project? Maybe not. Did I sleep better knowing the walnut wasn't going to surprise me after I finished? Absolutely.
Choosing Between One Solid Piece and Laminated Boards
This was one of the first design decisions. A single slab looks amazing. There is something special about seeing one continuous piece of wood with uninterrupted grain. The problem? Finding a perfectly wide, flat, affordable board is not always easy. Especially if you want premium species like walnut or white oak. For most people, gluing several boards together is the smarter option. A well-made glue-up can look just as good. Actually, sometimes better. The grain pattern becomes more interesting because you can intentionally arrange the boards. I spent more time selecting the order of the boards than I expected. I kept moving pieces around like a puzzle. This one looked better on the left. That one had a knot I wanted visible. Another board had a grain pattern that would disappear if I cut it. It felt excessive. Until the finish went on. Then I was glad I took the extra hour.
The Glue-Up Process
The glue-up is the moment where confidence disappears. You have beautiful wood. You have measured everything. Now you're about to cover the edges with glue and clamp it together. The first time I did this, I used too much glue. Way too much. I thought more glue meant a stronger joint. It doesn't. A good wood joint doesn't need a swimming pool of adhesive. It needs properly prepared surfaces and enough pressure to create a strong bond. Too much glue only creates a bigger cleanup problem. After applying glue, I tightened the clamps gradually. Not one side completely tight first. Not forcing the boards into position. Slowly bringing everything together. The goal isn't to squeeze the wood into submission. The goal is to let the pieces become one panel.
The Moment I Almost Ruined the Top
Here's the mistake nobody shows in their polished build photos. After the glue dried, I noticed a tiny height difference between two boards. Barely noticeable. Maybe half a millimeter. My first instinct was: "I'll just sand it flat." Bad idea. Sanding a large amount from hardwood creates uneven surfaces quickly. Your arms get tired. Your pressure changes. You accidentally create low spots. I caught myself before making it worse. Instead, I used a router sled to flatten the surface. It took longer. It created more dust than I wanted. But the final result was worth it. A flat desk shelf feels completely different when you run your hand across it. Your brain notices quality before your eyes do.
Designing the Shelf Supports
The supports are where function and style meet. You have several options. Simple wooden blocks. Angled legs. Metal brackets. Hidden supports. I experimented with a few designs before choosing a simple wooden structure. Why? Because I wanted the shelf to look like it belonged with the desk. Metal brackets can look great, but they introduce another material. For my setup, wood on wood felt more intentional. The supports needed to accomplish three things:
- Hold the shelf securely.
- Create usable storage underneath.
- Keep the visual weight light. That last part matters. A desk shelf shouldn't look like a small cabinet sitting on your desk. It should feel like the desk has grown another level.
Creating the Hidden Storage Space
This became my favorite part of the design. The space underneath the shelf is technically just empty air. But functionally, it became the most valuable area. I measured everything I wanted to store there before finalizing the height. My list:
- Keyboard
- Notebook
- External drives
- Headphones
- Small camera accessories The biggest mistake would have been making the shelf too low. A lot of commercial desk shelves look beautiful but leave almost no usable space underneath. They become monitor stands. Not workspace organizers. I wanted both.
Adding a Small Cable Management Feature
I know the article is about a desk shelf, but cables matter here too. A beautiful wooden shelf with cables hanging everywhere defeats the purpose. I didn't want a giant cable system. That would defeat the minimalist idea. Instead, I added a small channel on the back edge. Just enough space to guide:
- Monitor power cable
- USB cables
- Speaker wires The channel isn't visible from the front. It only does one job: keeping cables from becoming the first thing you notice. That's enough.
The Router Mistake That Taught Me Patience
I love using a router. Probably too much. There's something satisfying about creating a perfect edge profile in seconds. But routers also encourage overconfidence. While rounding the front edge, I decided to make "just one more pass." The bit grabbed slightly. Not enough to destroy the piece. Enough to remind me who's actually in control. I had to sand out the mark carefully. Luckily, it disappeared. But it reinforced something I've learned repeatedly: Woodworking rewards patience. The tool isn't the skill. Knowing when to stop is the skill.
Sanding: Where Good Builds Become Great
Most people think sanding is just preparation for finish. It isn't. Sanding is where the object starts becoming something you'll want to touch. I spent extra time on the front edge. That's where your hands naturally interact with the shelf. A sharp edge feels cheap. A properly softened edge feels intentional. I usually start lower:
- 80 grit
- 120 grit
- 180 grit Then finish around:
- 220 grit Going much higher isn't always better. Some finishes actually bond better when the surface has a little texture.
The Dry Assembly Test
Before applying finish, I assembled everything. No glue. No screws. No commitment. Just checking. This is where I discovered the shelf was slightly wider than I wanted. On paper, the measurement looked perfect. In reality, it made my desk feel cramped. Five minutes with a tape measure saved me from living with an annoying mistake every day. That's something I've learned from almost every furniture project: The final test isn't the measurement. It's the feeling. Sit down. Pretend you're working. Reach for your keyboard. Move your chair. Look at the space. Furniture exists in real life, not on graph paper.
At the end of the build stage, the desk shelf looked like a simple piece of wood furniture. But every small decision had a reason. The thickness. The height. The hidden channel. The storage space. None of those details would stand out individually. Together, they created exactly what I wanted: A shelf that made the entire workspace feel calmer without demanding attention. The next step was making the wood look as good as it deserved. Finishing the Desk Shelf and Turning Raw Wood Into a Piece of Furniture There is a moment in every woodworking project where the piece stops looking like a pile of boards and starts looking like something you actually want in your home. For this desk shelf, that moment happened during finishing. Before that, it was just wood. A nicely shaped piece of wood, but still just a project sitting on my workbench. After the finish went on, the grain came alive, the edges became smoother, and suddenly it looked like something that could have come from a high-end furniture store. This is also the stage where a lot of people ruin good work. Not because finishing is complicated. Because they get impatient. I've done it before. You spend hours cutting, routing, and sanding. You're tired. You just want to see the final result. So you rush. You put on too much finish. You touch it before it's cured. You skip sanding because "it already looks good." Then you spend another weekend fixing something that would have taken twenty extra minutes to do correctly. I've learned to slow down at this stage. The finish is the last conversation the wood has with you.
Choosing a Finish That Matches the Purpose
A desk shelf isn't a dining table. It doesn't need a thick, bulletproof commercial coating. But it does need to survive daily contact. Your hands will touch it. Your coffee mug will sit on it. Dust will collect on it. Your monitor stand will put pressure on the same area every day. The finish needs to protect the wood without making it feel like plastic. That last part matters. One reason I build with solid wood is because I like touching real wood. Covering it with a thick artificial layer defeats the purpose.
Why I Chose Hardwax Oil
For this project, I chose hardwax oil. I've used polyurethane before. It works. Actually, polyurethane is probably the safer recommendation for someone who wants maximum protection with minimal maintenance. But I personally prefer the feeling of hardwax oil. The surface stays natural. You can still feel the grain. The wood doesn't look like it's trapped under a layer of clear plastic. Another advantage is repairability. And with furniture, repairs matter. Eventually, something will happen. A scratch. A small dent. A coffee ring. Life happens. With hardwax oil, I can usually fix a small damaged area without refinishing the entire shelf. That matters more to me than having the hardest possible surface.
Preparing the Surface Before Finish
This is where patience separates good results from average ones. Before opening the finish container, I inspected the entire shelf under bright light. Not normal room lighting. Bright side lighting. That reveals everything. Small scratches. Glue marks. Uneven sanding. Tiny imperfections that disappear during the day but become obvious after finish. And here's something I learned the annoying way: Finish does not hide mistakes. It highlights them. A scratch that looks invisible on raw wood can suddenly become the first thing you notice after oil touches the surface. I learned to assume every visible mark will become twice as noticeable.
The First Coat Is Almost Magical
The first coat of hardwax oil is one of my favorite moments in woodworking. You wipe it on. The wood immediately changes. The grain gets deeper. The colors become richer. The boring-looking board from an hour ago suddenly looks expensive. This is the moment where people usually think: "I should have used this wood for everything." I had that thought. A lot. The important thing is not to get distracted and apply too much. More finish does not mean better protection. A thin, even application works better. The wood should absorb what it needs. Anything extra just creates problems later.
The Mistake I Made With the First Coat
I applied the first coat in my garage. Everything looked perfect. Until the next morning. I noticed tiny particles trapped in the surface. Dust. Not much. But enough. The problem? I underestimated how easily airborne particles travel. A garage that looks clean isn't necessarily clean enough for finishing. Now I prepare the area differently. Before applying finish:
- I clean the workspace.
- I remove unnecessary objects.
- I wait for dust to settle.
- I avoid creating airflow while the finish is exposed. It sounds excessive. It isn't. The final surface is only as clean as the environment around it.
Don't Forget the Bottom of the Shelf
This is a small detail that many DIY builders ignore. The underside. Nobody sees it. So why finish it? Because the wood does. A desk shelf has two exposed surfaces. Even if one faces downward, it still reacts to humidity. Finishing both sides helps keep moisture absorption more balanced. I also finished the inside edges of the hidden cable channel. That might seem unnecessary. But unfinished areas collect dirt faster, especially in small spaces where cleaning tools don't easily reach.
Creating the Smooth "Furniture Feel"
The difference between a homemade project and a professional-looking piece is often the edges. Not the expensive wood. Not the fancy tools. The edges. Sharp corners feel unfinished. Even if the measurements are perfect. For the front edge of the shelf, I used a small round-over. Nothing dramatic. Just enough to remove the sharpness. When you place your hands on it every day, that tiny curve makes a huge difference. It's one of those details visitors never consciously notice. But they feel it.
Installing the Monitor and Testing Real Usage
After the finish cured, I finally placed it on my desk. This was the moment where theory met reality. The shelf looked good. But did it actually work? I installed my monitor. Placed my keyboard underneath. Moved my chair into position. And immediately noticed something. The monitor was slightly too high. Not by much. Maybe an inch. But after ten minutes of typing, my shoulders started feeling uncomfortable. This is why copying dimensions from someone else is dangerous. A desk shelf isn't a decoration. It's part of your ergonomic setup. I adjusted the height by changing the feet slightly. Problem solved.
Adding Small Feet and Protecting the Desk Surface
One detail I almost skipped was adding soft feet underneath the shelf supports. I'm glad I didn't. Wood against wood looks great. Until you move it. Then small scratches appear. Felt pads or rubber feet solve this. They also reduce vibration. Especially if you have speakers sitting on the shelf. The difference isn't dramatic, but small improvements add up. Good furniture is usually a collection of tiny decisions that nobody notices individually.
The Unexpected Benefit of the Shelf
I originally built this because I wanted my desk to look cleaner. I didn't expect it to change how I worked. But it did. Before the shelf, my monitor, keyboard, notebooks, and accessories all competed for the same flat surface. Everything was at the same level. Everything felt crowded. The shelf created separation. The monitor moved up. The keyboard area became open. Small items had a dedicated place underneath. The desk didn't become bigger. It just became more organized. That's the magic of vertical space.
The Final Test: Living With It
The real test of any DIY project isn't the day you finish it. It's three months later. Does it still make sense? Do you still like using it? Does it solve the problem you built it to solve? A lot of beautiful projects fail here. They look amazing. But they don't improve your daily life. This one did. The desk feels calmer. The workspace feels intentional. And the best part? I stopped constantly rearranging things. The shelf quietly does its job in the background. Which, ironically, is exactly what minimalist design should do.
The next challenge wasn't building the shelf. It was making sure it stayed useful as my setup changed. Because technology never stays the same, and a good workspace has to evolve with it. Living With the Desk Shelf: The Small Details That Made It Worth Building The easiest way to judge a piece of furniture is not by how it looks on the day you finish it. That day is always a little misleading. Everything is clean. Everything is organized. The photos look perfect. You are still excited because you just completed something with your own hands. The real test happens months later. When the novelty disappears. When you stop thinking about the build and simply start using the object. That's where this desk shelf surprised me. I expected it to make my workspace look better. I didn't expect it to change how I interacted with my desk.
The Desk Stopped Becoming a Storage Area
Before building the shelf, my desk had a problem that I think a lot of people have. The surface slowly became a parking lot. A notebook would appear. Then a camera battery. Then a charging cable. Then a pair of headphones. Then some random adapter that I was "definitely going to put away later." Later rarely came. The problem wasn't that I owned too many things. The problem was that everything lived on the same level. There was no separation between the things I was actively using and the things I was temporarily storing. The desk shelf fixed that. The main surface became a workspace again. The shelf became the home for the things that needed to stay nearby. That small separation created a surprising amount of mental clarity.
The Hidden Space Became the Most Valuable Feature
When I designed the shelf, I thought the main attraction would be the wooden top. The grain. The finish. The craftsmanship. Those things matter. But after living with it, the space underneath became my favorite part. That empty area became where everything disappeared. Keyboard when I'm not typing. External hard drives. Notebook. Small tools. Headphones. Even my phone sometimes. It created a visual boundary. The desk no longer looked like a collection of objects. It looked intentional. And that's harder to achieve than people realize. Minimalism isn't about owning nothing. It's about making sure everything has somewhere to belong.
How I Handle Cable Management Now
One thing I changed after building this shelf was how I think about cables. Before, I treated cables like an unavoidable problem. Something you hide after everything else is finished. Now I think about them during the design stage. The shelf itself has a small rear channel that guides cables toward the back. Nothing complicated. No giant cable management system. Just enough structure to stop wires from becoming visual distractions. The best cable management is usually invisible. You shouldn't look at a desk and think: "Wow, that's great cable management." You should look at it and not think about cables at all. That's the goal.
The Mistake I Would Avoid Next Time
If I built this exact shelf again, I would make one change. I would build the cable channel slightly wider. Not because it doesn't work. It works perfectly for my current setup. But technology has a funny habit of creating thicker and thicker accessories. A USB-C dock today is not the same size as one from a few years ago. A monitor arm might need a different cable route. A new speaker system might require something completely different. When building furniture around technology, always leave room for things you haven't bought yet. The future always arrives with more cables.
Designing Around Your Actual Workflow
One mistake people make with minimalist setups is copying someone else's desk. They see a beautiful workspace online. They copy the shelf. They copy the monitor position. They copy the accessories. Then they wonder why it doesn't feel right. The reason is simple: The setup was designed for someone else's habits. My shelf works because it matches what I actually do. I spend hours writing, researching, editing, and switching between devices. Someone who draws digitally might need completely different dimensions. Someone who games might need space for controllers and accessories. Someone who records audio might need room for microphones and interfaces. The best workspace isn't the one that looks the cleanest in a photo. It's the one that removes friction from your day.
Maintenance Is Almost Nonexistent
People sometimes assume solid wood furniture requires constant attention. It really doesn't. The shelf has been much easier to maintain than some cheaper furniture I've owned. My routine is simple: A microfiber cloth every few days. A slightly damp cloth when necessary. Refreshing the hardwax oil occasionally. That's basically it. The nice thing about solid wood is that small imperfections actually improve the character. A tiny mark doesn't make it look damaged. It makes it look used. There is a difference. Mass-produced furniture often tries to hide aging. Real wood accepts it.
Would I Recommend Building One Instead of Buying?
It depends. If you need a desk shelf tomorrow, buying one makes sense. There are excellent products available. Not every piece of furniture needs to become a weekend project. But if you enjoy building things, there is something special about creating an object that fits your exact environment. The process teaches you things: How much space you actually need. How you interact with your workspace. What annoys you every day. Those lessons are difficult to buy.
The Cost Reality
One thing worth mentioning is that DIY isn't always cheaper. This surprises people. A nice piece of hardwood can be expensive. Quality finish costs money. Tools cost money. Time has value. If your only goal is saving money, a store-bought shelf may win. But that's not why I build furniture. I'm not just buying an object. I'm creating something that solves a specific problem. A factory can't know that I prefer my keyboard slightly lower. It can't know where my headphones should sit. It can't know that I hate seeing cables from my chair. A custom build can.
The Detail Nobody Notices Until It's Missing
After using this shelf for a long time, I think the biggest improvement isn't any individual feature. It's the absence of annoyance. Nobody walks into my office and says: "That shelf has excellent proportions." They usually don't notice it at all. And that's actually the compliment. Good design disappears. It quietly removes problems. It makes the room easier to use. It supports your habits without demanding attention.
If I Built Version Two
This current build reflects a deeper engineering focus, moving beyond simple aesthetics to become a high-performance tool. I successfully integrated a MagSafe-compatible wireless charging puck directly into the walnut, a process that required precise CNC routing to leave only a paper-thin layer of wood above the charger. This allows for a seamless, invisible charging experience that maintains the minimalist profile while embracing modern power requirements. The result is a shelf that doesn't just hold technology—it powers it. But I would keep the same philosophy. Simple. Useful. Built around the way I work. Not built around what looks good in a product photo.
The Reason I Still Like This Project
I've built bigger things. More complicated things. Projects that required more tools and more technical skill. But this small desk shelf remains one of the projects I use the most. Every single day, I interact with it. Every single day, it solves a small problem. That's the thing I appreciate most about good DIY furniture. It doesn't have to be impressive. It just has to make your life slightly better. A cleaner desk. A calmer workspace. A place where your tools and technology feel organized instead of scattered. That's what this shelf became. Not a decoration. Not another accessory. A small piece of furniture that quietly makes the rest of the room work better. And honestly, that's probably the best reason to build anything yourself.
About the Author

Pedro Arian Viena
Maker & Furniture Designer
Craftsman and home designer passionate about solid wood joinery, custom furniture fabrication, architectural built-ins, and local smart home automation. I write detailed guides on building beautiful, functional living spaces.