The Right Way to Build a Slatted Wood Wall for Room Acoustics
 Pedro Arian Viena··Updated April 5, 2026·26 min read
Project Specifications & Materials
Part 1 — Why Most Slatted Wood Walls Look Amazing but Barely Improve Sound
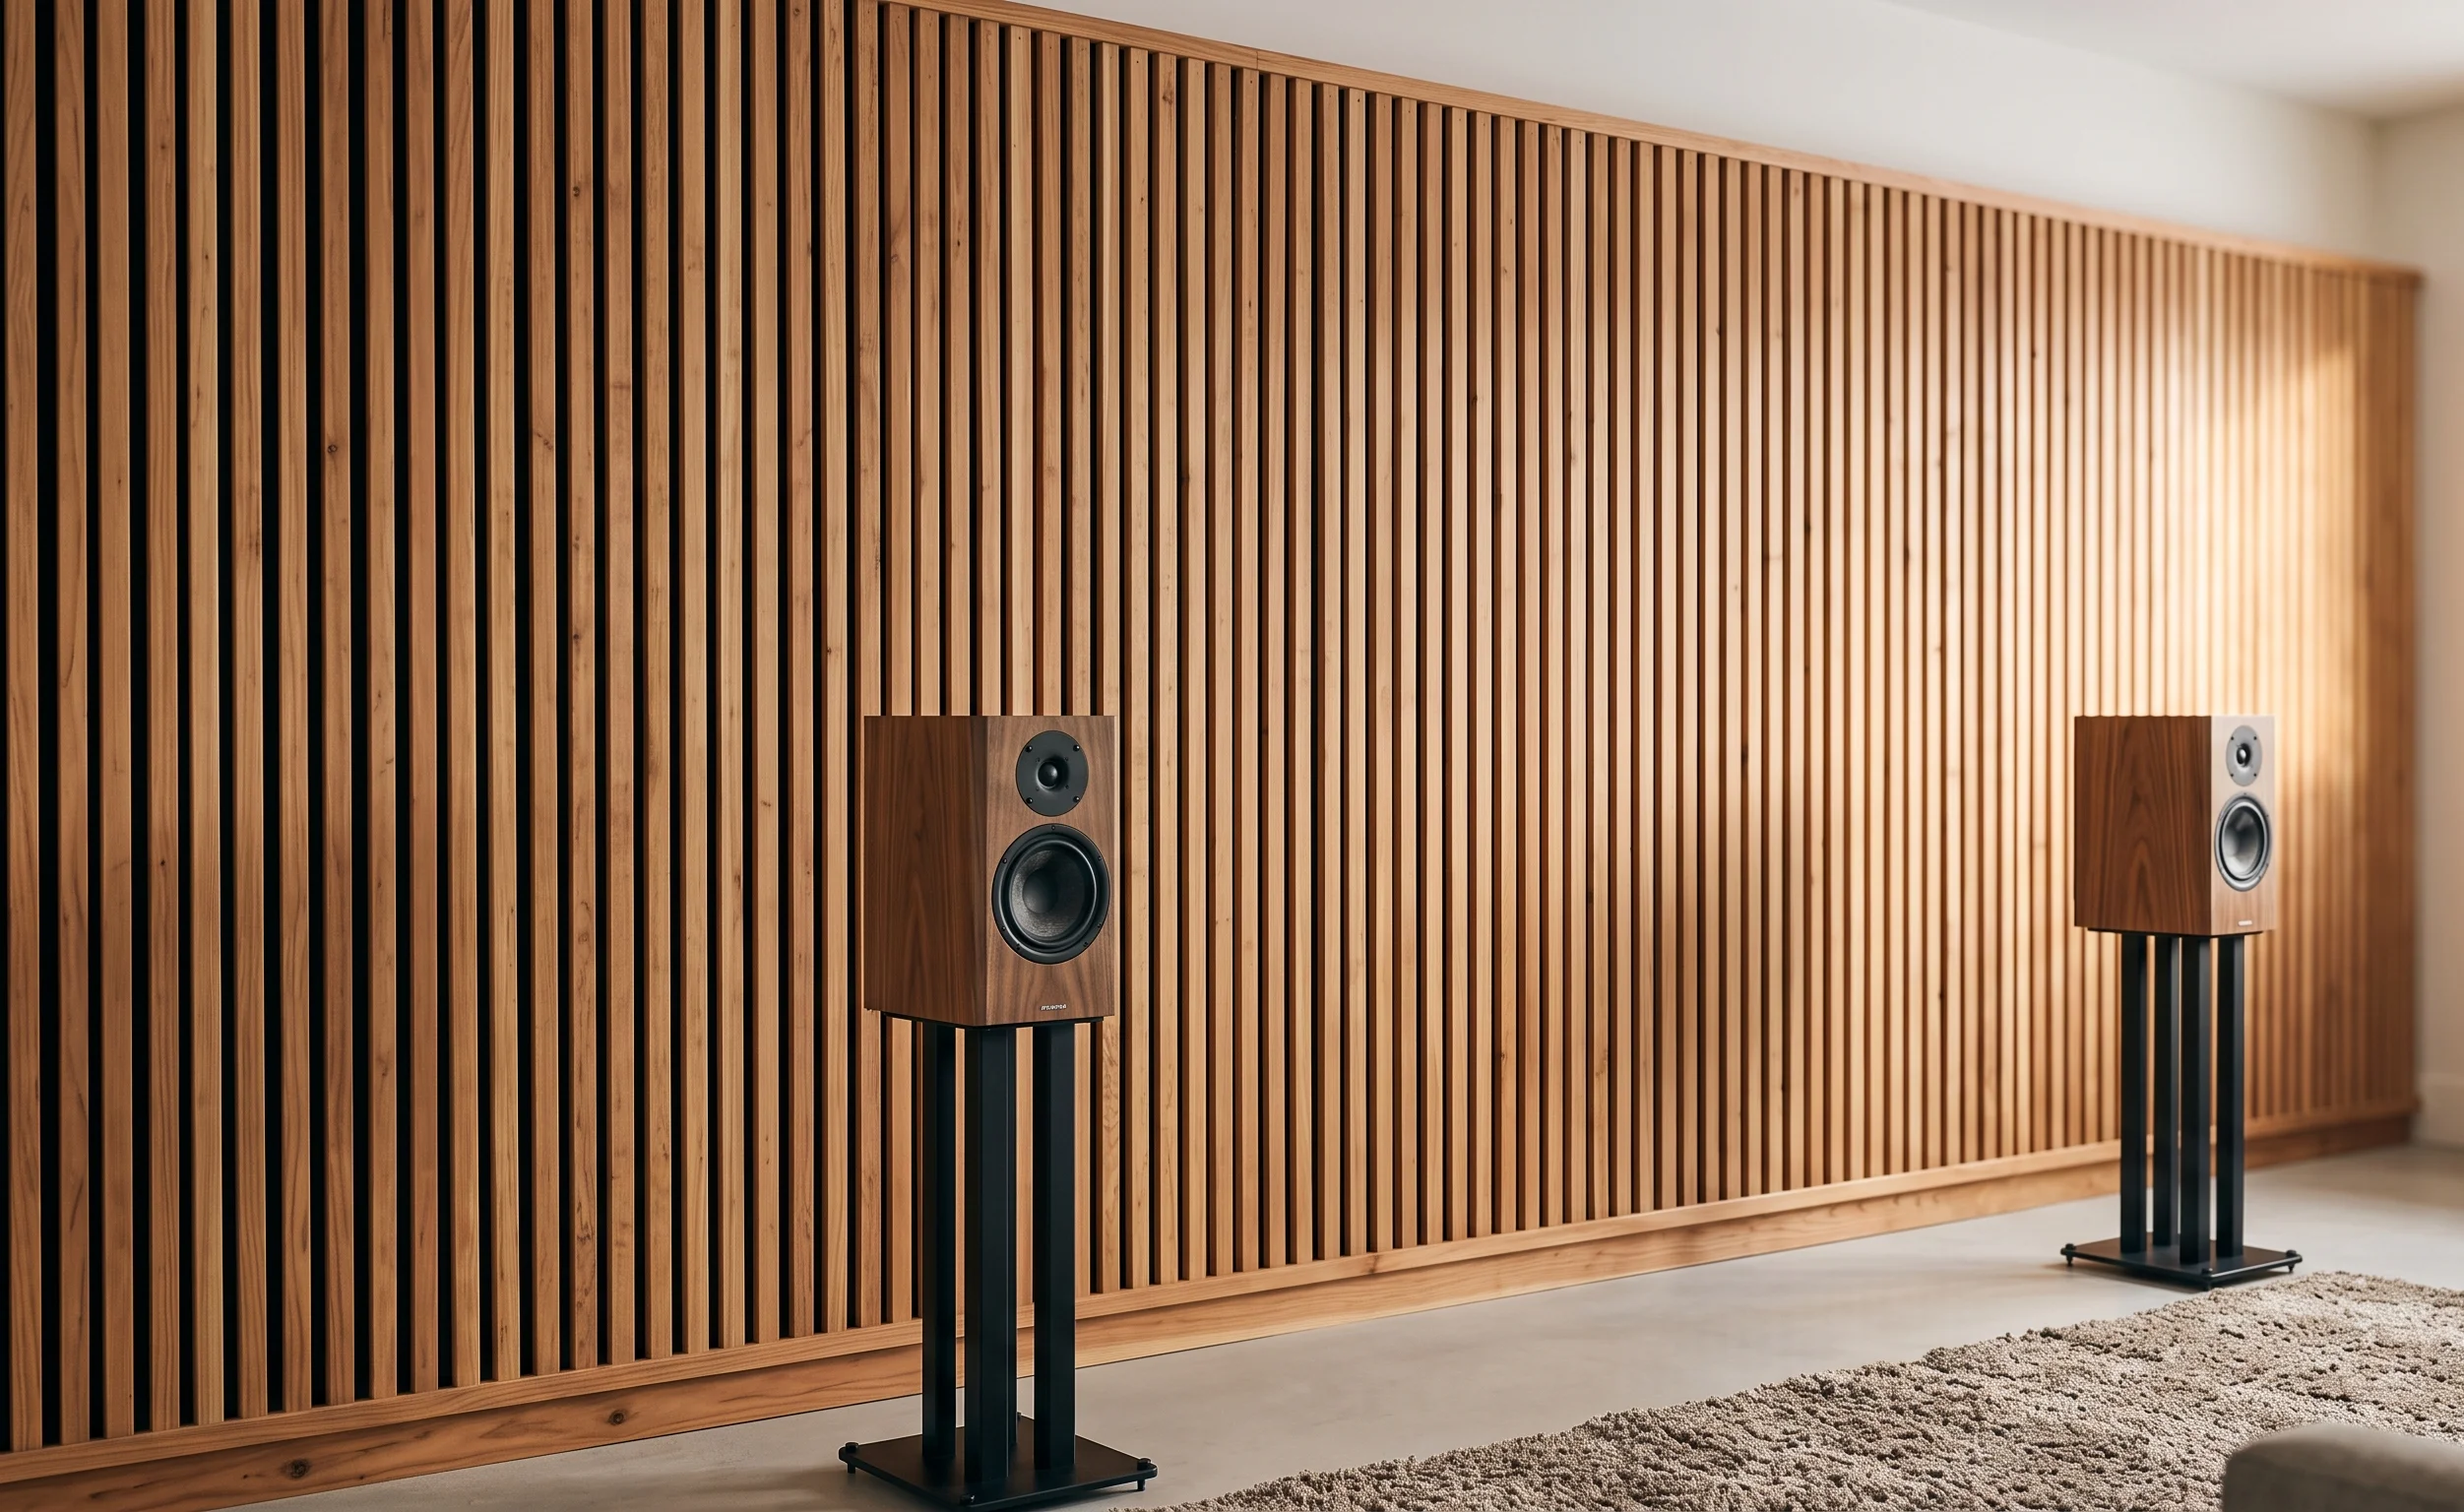
The first slatted wood wall I built was supposed to solve two problems at the same time. I wanted the room to look better, and I wanted the acoustics to improve. The visual part worked immediately. The room looked warmer. The wood added texture. The flat painted wall that had always felt empty suddenly became the feature of the space. The acoustic improvement, however, was much less impressive. The room looked like a professional studio. It did not sound like one. That was the mistake. I had approached the project like an interior design feature instead of an acoustic system. And those are two very different things. A lot of slatted wood wall projects online make the same mistake. They focus almost entirely on the visible part: beautiful wooden strips, perfect spacing, black felt backing, and clean installation. The result looks expensive. But appearance alone does not determine acoustic performance. A wall with wooden slats is not automatically an acoustic treatment. The engineering happens behind the wood.
Understanding What a Slatted Wall Actually Does
Before building one, it helps to understand what problem you're trying to solve. Most rooms don't have a volume problem. They have a reflection problem. Sound leaves your speakers or your voice, travels through the room, and bounces from hard surfaces. Those reflections arrive slightly after the original sound. Your brain receives both signals and starts processing a mixture of direct sound and delayed sound. In a normal room with:
- Painted drywall
- Glass windows
- Hardwood floors
- Large empty walls those reflections can create:
- Echo
- Harsh high frequencies
- Poor speech clarity
- Muddy recordings
- Fatiguing listening sessions A slatted wood wall helps by reducing some of those reflections and allowing sound energy to enter an absorbent layer behind the wooden surface. The important part is that last sentence. The wood itself is only the visible surface. The absorption happens because sound passes through the gaps and interacts with the material behind it. Without that absorption layer, you mostly have an attractive decorative wall.
The First Mistake I Made: Treating the Slats as the Acoustic Solution
When I started researching the build, I naturally focused on the part everyone sees. The slats. I spent hours comparing wood species, widths, spacing, and finishes. I was thinking like a furniture maker. Not like an acoustic designer. Eventually, I realized I was optimizing the wrong component. The wood determines:
- Appearance
- Durability
- Style
- Maintenance The cavity behind the wood determines much of the acoustic behavior. That changed the entire design. Instead of asking: "How do I make the slats look perfect?" I started asking: "How does sound enter this system, and what happens after it gets behind the slats?" That question is where the real engineering begins.
The Anatomy of a Proper Slatted Acoustic Wall
A well-designed slatted wall is usually made from several layers working together. Each layer has a purpose.
- Wooden Slats This is the visible layer. The slats create the aesthetic identity of the wall and control how much sound can pass through. Common materials include:
- Oak veneer
- Walnut veneer
- Ash
- Solid wood strips
- MDF wrapped with wood veneer Solid wood looks incredible, but it is not always the best engineering choice. Large areas of solid wood can become expensive and introduce more movement with humidity changes. For many projects, veneered acoustic panels offer a better balance between appearance, stability, and cost.
- Air Gap This is the part many DIY builders ignore. The space between the wooden surface and the wall matters. A slatted wall installed directly against drywall has limited acoustic benefit. Creating an air cavity changes how sound behaves. The cavity gives sound energy room to move before reaching the absorbing material. Even a relatively small gap can improve performance. This is why professional installations usually include a mounting framework instead of attaching everything directly to the wall.
- Absorptive Material This is the component doing the heavy lifting. Common options include:
- Rock wool
- Mineral wool
- Acoustic fiberglass
- Polyester acoustic panels The goal is not to block sound. It is to reduce reflected energy. This distinction matters. People often confuse acoustic treatment with soundproofing. They are completely different. A slatted acoustic wall improves the sound inside a room. It does not stop your neighbor from hearing your speakers.
Acoustic Treatment vs Soundproofing
This confusion causes a lot of wasted money. A beautiful wood slat wall will not magically prevent sound from leaving a room. Soundproofing requires controlling transmission. That usually involves:
- Mass
- Decoupling
- Sealing air gaps
- Structural changes Examples:
- Additional drywall layers
- Resilient channels
- Acoustic insulation inside walls
- Proper door seals A slatted acoustic wall is about improving the experience inside the room. It helps your music sound cleaner. It helps your voice recordings sound more controlled. It reduces unwanted reflections. But it does not turn a bedroom into an isolated recording studio. Understanding that difference before starting the project prevents unrealistic expectations.
Choosing the Right Location
Where you install the wall matters almost as much as how you build it. A common mistake is choosing the wall based purely on appearance. "I want this wall to look interesting." That's understandable. But acoustics doesn't care about aesthetics. The best location depends on the room. For a listening setup, common strategic locations include:
- Behind speakers
- First reflection points
- Behind a desk
- Rear wall behind the listener For a recording space, the priorities may change. A microphone setup has different requirements than a music listening setup. Before building anything, I recommend spending time in the room and identifying where reflections are actually happening. Sometimes the wall you want to decorate is not the wall creating the biggest acoustic problem.
The Engineering Decision That Changed My Build
The biggest improvement I made was stopping myself from thinking about the wall as decoration. I started treating it as a layered system. Wood. Air. Absorption. Structure. Each layer had a reason. Once I understood that, every measurement became easier. The slat width mattered. The spacing mattered. The backing material mattered. The mounting method mattered. The project stopped being about copying a Pinterest image and became a controlled design problem. And that's when the results started matching the expectations. The next stage was deciding exactly how to build the structure: choosing the wood dimensions, calculating spacing, creating the mounting frame, and making sure the wall looked intentional instead of like a collection of wooden strips attached randomly. Designing the Slats, Building the Frame, and Getting the Acoustics Right The hardest part of building a slatted wood wall is not cutting the wood. It is making dozens, sometimes hundreds, of small decisions that all affect the final result. A wall like this is extremely visible. There is nowhere for mistakes to hide. A crooked cabinet door can be adjusted. A slightly uneven shelf can be ignored. A slatted wall with inconsistent spacing will bother you every time you walk past it. The repetition is what makes it beautiful, but repetition also makes imperfections obvious. That means planning matters more than speed.
Choosing the Right Slat Dimensions
When people first design these walls, they usually focus on the wood species. Walnut or oak? Dark or light? Natural finish or stained? Those choices matter, but the proportions of the slats often have a bigger visual impact. The relationship between the width of the slat and the size of the gap determines the rhythm of the entire wall. A few common approaches:
- Narrow slats with small gaps create a refined, detailed appearance.
- Wider slats with larger gaps create a stronger architectural look.
- Random spacing creates a more artistic appearance but is harder to execute cleanly. For my build, I preferred consistency. There is something satisfying about a wall where every line feels intentional. The goal wasn't to make people notice individual slats. The goal was for the entire surface to feel balanced.
The Mistake I Almost Made With Spacing
At first, I thought smaller gaps would automatically mean better acoustics. It seems logical. More wood. Less open space. More surface area. But acoustic behavior isn't that simple. The gaps are actually part of the system. They allow sound waves to reach the absorbent material behind the slats. Closing them too much can reduce the amount of energy entering the absorption layer. This is one of the reasons copying a random design from the internet can be misleading. A wall that looks similar may perform completely differently depending on what exists behind it. The visible pattern is only one piece of the equation.
Creating a Consistent Layout
This is where a simple project becomes a precision project. If you are installing dozens of slats, measuring each one individually is a recipe for frustration. Small errors accumulate. A 2 mm mistake on one slat is nothing. A 2 mm mistake repeated forty times becomes obvious. I created a simple spacer block instead. The spacer was cut to the exact gap I wanted. Every slat was installed using the same reference. No guessing. No measuring every time. This is one of those simple workshop tricks that saves hours. Professional installers do the same thing. They don't rely on memory. They create systems that prevent mistakes.
Preparing the Wall Before Installation
The final appearance depends heavily on what happens before the first slat goes up. Walls are rarely perfectly straight. Especially in older homes. A small curve in drywall can create uneven shadows across the entire installation. Before building the frame, I checked:
- Wall flatness
- Stud locations
- Electrical outlets
- Baseboards
- Corners This step feels slow because nothing visible is happening. But this is where professional-looking projects are created. A beautiful surface cannot compensate for a poor foundation.
Building the Mounting Framework
I strongly recommend building a proper frame behind the slats. Some people attach everything directly to drywall. I wouldn't. The frame provides several advantages:
- Creates the acoustic cavity.
- Gives you something solid to attach the slats to.
- Allows easier leveling.
- Makes future removal possible. The frame itself doesn't need to be complicated. Usually, simple wooden battens attached horizontally and vertically are enough. The important part is creating a consistent structure. The slats should follow the frame, not the imperfections of the wall.
Finding Studs Instead of Trusting Drywall Anchors
This is a boring detail that becomes important years later. A large slatted wall can weigh a lot. Especially when you add:
- Wooden slats
- Supporting frame
- Acoustic insulation
- Fasteners Drywall anchors are useful for many things. A heavy architectural wall treatment is not one of them. I marked every stud before installing the frame. It took extra time. It also meant I never had to wonder whether the wall was properly supported. The strongest installation is the one you don't have to think about afterward.
Choosing the Absorption Material
Behind the wood is where the acoustic performance is created. This is where I think many DIY projects underestimate the importance of material choice. A thin layer of cheap foam may look like acoustic treatment. It usually isn't. For serious improvement, dense porous materials perform much better. Mineral wool is a popular choice because it provides excellent absorption across a wide frequency range. It also maintains its performance inside the cavity. The thickness matters. A very thin layer behind the slats will not behave the same way as a deeper acoustic cavity with proper insulation. The physics is simple: More effective interaction between sound energy and absorbing material generally means better results.
Handling Mineral Wool Without Making a Mess
This part is not glamorous. Nobody includes it in the beautiful final photos. But installing insulation is where many people realize they underestimated the project. Wear proper protection. Gloves. Long sleeves. Eye protection. A mask suitable for the material. The goal is not to make the job dramatic. It's just common sense. I also recommend cutting everything before installation whenever possible. Stopping halfway through to cut another piece while covered in insulation fibers is not enjoyable.
The Hidden Challenge: Making Everything Removable
One question I asked myself was: "What happens if I change the room later?" A permanent installation is attractive because it feels solid. But homes change. Furniture changes. Technology changes. Your taste changes. I designed the frame so the wall treatment could theoretically be removed without destroying the entire wall. That meant:
- Accessible fasteners.
- Careful planning around outlets.
- Avoiding unnecessary adhesives. Permanent doesn't always mean better. Sometimes good design means allowing future flexibility.
Electrical Planning Before Covering the Wall
This is the kind of mistake you only make once. I almost covered an outlet. Almost. Luckily, I checked everything before final installation. A slatted wall changes the relationship between the wall and your electrical components. Things to consider:
- Outlet access
- Light switches
- Cable routes
- Future equipment If your wall contains electronics, plan those locations before the wood goes up. Trying to modify a finished slatted surface is painful.
The First Few Slats Are the Most Important
Once installation begins, the first few pieces determine everything. If the first slat is slightly wrong, every following slat follows that mistake. I spent more time positioning the first three slats than the next thirty. That felt inefficient. It wasn't. The beginning establishes the reference line. After that, the process becomes repetitive. This is the same principle used in flooring, cabinetry, and tile installation. The first row carries the responsibility for everything that follows.
The Difference Between DIY and Professional Results
The final quality usually doesn't come from expensive materials. It comes from controlling variables. Professional-looking results happen because the builder controls:
- Alignment.
- Spacing.
- Level.
- Material preparation.
- Installation sequence. The tools help. The planning matters more. A thousand-dollar piece of wood installed poorly will still look wrong. A carefully planned, affordable material can look exceptional.
By the end of the framing stage, the project starts to change character. At first, it feels like construction. Wood. Screws. Measurements. Dust. Then the first rows of slats go up, and suddenly the room begins to transform. The next challenge is finishing the visible surface, dealing with the small imperfections that appear during installation, and making sure the final wall actually improves the sound instead of just looking like it should. Installing the Slats, Finishing the Wood, and Tuning the Wall for Better Sound There is a specific moment during a slatted wall installation where the project finally starts looking like the image you had in your head. For me, it happened after installing the first few rows of slats. Before that, everything looked like preparation. The frame. The insulation. The measurements marked on the wall. None of it looked impressive. Then the wood started covering the surface, and the room changed almost immediately. The interesting thing was that the visual transformation happened much faster than the acoustic transformation. The wall looked finished before it actually was. That is something worth remembering with acoustic projects. A room can look like a studio and still have poor sound. The materials only work when the entire system is built correctly.
Installing the First Slats Without Losing Alignment
The first slat is the one that decides whether the entire wall will look professional or slightly wrong. That sounds exaggerated, but it isn't. A small angle error at the beginning becomes a much larger visual problem at the other side of the wall. I used a level constantly during the first section. Not because I didn't trust my measurements. Because walls are rarely perfect. The goal isn't making the wall follow the existing surface. The goal is creating a new perfectly controlled surface in front of it. Once the first reference line was correct, the installation became much faster. The spacer block did most of the work. Place slat. Check alignment. Secure. Move the spacer. Repeat. The process is repetitive, but that repetition is exactly what creates the clean architectural appearance.
The Fastest Way to Ruin a Slatted Wall
Trying to rush it. That is the answer. The wall looks simple enough that people underestimate the time required. They think: "These are just wooden strips. I'll finish this in an afternoon." Maybe. If the wall is small. If the materials are already prepared. If nothing goes wrong. Realistically, the finishing details take longer than expected. The cuts around outlets. The corners. The top edge. The transitions. Those small areas are where the quality becomes obvious. Anyone can install the middle section. The difficult parts are where the wall meets everything else.
Working Around Outlets and Electrical Components
This was one of the areas I spent the most time planning. A normal wall is forgiving. A slatted wall is not. Every interruption becomes part of the design. An outlet sitting slightly uneven inside the slats immediately draws attention. Before cutting any openings, I measured multiple times. Then I measured again. Wood has a strange way of making a mistake feel permanent. With paint, you can patch. With a finished wooden surface, a bad cut becomes part of the wall. For electrical openings, I prefer making the cut slightly smaller first. You can always remove more material. You cannot put it back.
Choosing the Right Finish for the Slats
The finish decision depends heavily on the room. A living room feature wall has different requirements than a recording space. For my project, I wanted the wood to feel natural rather than glossy. A high-gloss finish would have created reflections and made the surface look more like furniture than architecture. I preferred a matte or satin appearance. The goal was to preserve the texture of the wood. You want people to notice the material, not a shiny layer sitting on top of it.
Why I Avoided Heavy Staining
This was another decision that changed during the project. Initially, I considered making the wood darker. A deep walnut color. Something dramatic. But after testing samples, I realized the natural grain was already doing the work. Heavy stain can sometimes make different pieces of wood look more similar. That sounds useful, but it can remove character. The small variations are what make natural wood interesting. The goal wasn't to make the wall look manufactured. It was to make it feel intentional.
The Finishing Mistake I Made on My First Attempt
I underestimated how much dust exists in a workshop. The wood looked perfectly clean. The finish looked smooth while wet. Then it dried. Suddenly, tiny particles were visible everywhere. Not enough to ruin the wall. Enough to annoy me every time I looked closely. The lesson was simple: Finishing large surfaces requires controlling the environment. Before applying finish now, I clean more aggressively than I think is necessary. I vacuum the area. I remove unnecessary movement. I wait. Patience during finishing is cheaper than repairing mistakes later.
The Acoustic Improvement Was Not Instant
This surprised me. After installing the slats, I expected the room to immediately sound different. It did improve. But the change was more subtle than the visual transformation. The room didn't suddenly become silent. That's not how acoustic treatment works. Instead, the character of the room changed. My voice sounded more controlled. Music felt less harsh. The room had less of that empty, reflective feeling. The biggest difference appeared during longer sessions. Before, spending several hours in the room could become tiring. After the treatment, the space felt calmer. The sound wasn't dramatically louder or quieter. It was simply more balanced.
Testing the Room Before and After
One mistake I see often is people relying only on their ears. Your ears adapt. A room can sound normal after you spend enough time inside it. Before finishing the wall, I recorded the room. Nothing complicated. Just simple tests. Speaking from the same position. Playing familiar music. Listening from different locations. After the installation, I repeated the same tests. The difference wasn't imaginary. The reflections were reduced. The room felt more controlled. You don't need expensive laboratory equipment to notice improvement. You just need a consistent comparison.
The Importance of Not Over-Treating the Room
This is another point people misunderstand. More acoustic treatment is not always better. A completely dead room can feel unnatural. The goal is balance. You still want some natural character. A room should not feel like you are speaking inside a closet covered with foam. The best acoustic spaces control reflections without removing all life. That balance is why wood slatted systems are so interesting. They combine absorption with diffusion. The wooden surface still interacts with sound. The backing material handles unwanted energy.
Cleaning and Maintenance After Installation
One advantage of a properly finished wood wall is that maintenance is simple. The biggest enemy is dust. The small gaps between slats naturally collect particles. I use a soft brush attachment on a vacuum occasionally. Nothing aggressive. No complicated cleaning products. The finish protects the wood, but it doesn't make it maintenance-free. Natural materials require some attention. That is part of owning something made from real wood.
The Detail That Made the Biggest Visual Difference
Surprisingly, it wasn't the wood species. It wasn't the finish. It was consistency. The wall looks expensive because every spacing decision feels controlled. The human eye is extremely sensitive to patterns. A single uneven gap can stand out more than a small scratch in the wood. That is why taking your time during installation matters more than buying the most expensive materials. Precision creates the premium feeling.
Living With the Finished Wall
After the project was complete, the biggest change wasn't something I could photograph. The room became easier to use. The wall didn't demand attention. It simply improved the environment. The space felt warmer. The sound felt cleaner. The visual background became calmer. That is usually the sign of good design. The best improvements don't constantly remind you they exist. They quietly make everything around them better.
The final stage was learning what I would change if I built another one. After living with the wall through different seasons, different equipment, and different uses of the room, some decisions proved excellent while others revealed opportunities for improvement. What I Would Change on a Second Build and the Lessons This Wall Taught Me The interesting thing about building a large feature wall is that you spend weeks thinking about the installation, but you spend years experiencing the decisions you made. The construction phase has an obvious finish line. The last slat goes up. The final piece is secured. The tools are put away. But the real evaluation begins afterward. You start noticing small things. The way light hits the wood in the afternoon. The way the room sounds when you are on a video call. The way the wall behaves when the seasons change and humidity moves the material slightly. That is when you find out whether you built something beautiful or something genuinely useful. After living with this slatted acoustic wall, I can say it was one of the more rewarding upgrades I've made to a room. Not because it transformed the space overnight. Because it solved several small problems at the same time.
The Biggest Lesson: Design the Room, Not Just the Wall
When I started this project, I was focused on the wall itself. The wood. The spacing. The finish. The installation. Looking back, the better approach would have been to start with the room. Every room has its own acoustic personality. The same wall design can perform differently depending on:
- Room size.
- Ceiling height.
- Flooring material.
- Furniture placement.
- Speaker location.
- Wall construction. A small office with hardwood floors behaves completely differently from a living room with carpet and upholstered furniture. The wall is only one part of the acoustic environment. This is something I wish more tutorials explained. There is no universal "best" acoustic wall. There is only the best solution for a specific room.
The One Thing I Would Improve: More Planning Before Construction
If I built another slatted wall, I would spend even more time on the planning phase. Not because anything went wrong. Actually, the build worked very well. But I realized afterward that several decisions could have been optimized earlier. For example, I would plan the exact locations of:
- Speakers.
- Monitor mounts.
- Lighting.
- Cable exits.
- Future equipment. A beautiful wall becomes much more useful when it supports everything around it. The mistake is treating the wall as a separate object. It is part of the room's infrastructure.
I Would Design More Access Points
This is one of those details you only appreciate later. During installation, it is easy to think: "I'll never need to access anything behind this." Then life happens. A cable needs replacing. A power outlet needs attention. A device gets upgraded. Suddenly, the thing you thought you would never touch becomes important. For a future build, I would create more intentional access points. Not visible ones. Just enough to make future changes easier. Good design considers the possibility that your future self will need to modify something.
The Acoustic Results: What Actually Improved
After spending a long time with the wall, I think it's important to be realistic about what changed. The room did not become soundproof. People outside the room could still hear sound. Loud noises were still loud. That was never the goal. The improvements were inside the room. Speech became clearer. Recordings sounded less affected by the room. Music felt more controlled. The space had less of that empty, reflective character. The biggest improvement was reducing the amount of uncontrolled sound bouncing around. That made the room more comfortable to spend time in.
The Psychological Effect Was Unexpected
This was something I didn't anticipate. The wall changed how the room felt. Not just acoustically. Visually. A blank painted wall is neutral. A wood slat wall adds texture and depth. The room feels more intentional. That matters because our environment affects how we work. When a space feels unfinished, your brain notices. Small imperfections create background noise. A carefully designed room removes some of that distraction. The acoustic improvement helped. The visual improvement helped too. Together, they made the room feel like a place designed for focus.
Was Solid Wood the Right Choice?
This is a question worth answering honestly. Solid wood looks incredible. There is nothing quite like seeing real grain across a wall. But it is not always the most practical option. Large installations require a lot of material. The cost increases quickly. Wood movement becomes more important. Installation becomes heavier. For many projects, high-quality veneer panels are actually the smarter engineering decision. They provide the appearance of premium wood while improving stability and reducing waste. A good design is not about choosing the most expensive material. It is choosing the material that best fits the purpose.
Things I Would Avoid Next Time
There are a few mistakes I would avoid if I started again. First, I would not underestimate preparation time. The visible installation is only part of the project. Planning, measuring, testing, and preparing materials take longer than expected. Second, I would avoid buying materials before finalizing the acoustic design. It is easy to fall in love with a specific wood or style. But function should come first. Third, I would not rush the finishing stage. The wall becomes part of your home. Small imperfections become something you see every day. Taking an extra afternoon is always cheaper than regretting a shortcut.
The Difference Between Decoration and Design
This project changed how I think about interior improvements. A decorative project asks: "Does this look good?" A design project asks: "Does this improve the way I experience the space?" The best projects answer both questions. The slatted wall looks better. But more importantly, it changed how the room functions. It reduced unwanted reflections. It created a more comfortable environment. It made the space feel intentional. That is the difference between adding something to a room and actually improving it.
Would I Build Another One?
Yes. But I would approach it differently. I would spend more time measuring the room before deciding the design. I would plan future technology changes. I would create more flexibility behind the surface. And I would remember the biggest lesson from this project: The beautiful part everyone sees is only the final layer. The real work happens underneath. The cavity depth. The material selection. The mounting structure. The acoustic reasoning. Those invisible decisions are what separate a wall that simply looks like an acoustic treatment from one that actually performs like one.
Final Thoughts From Living With It
After years of seeing this wall every day, I no longer think about the individual slats. I don't notice the spacing. I don't think about the hours spent measuring. I don't remember every cut. I simply use the room. And that is probably the best compliment a design can receive. Good architecture disappears into daily life. It supports what you do without demanding attention. A properly built slatted wood wall is not just a trend from interior design photos. When engineered correctly, it becomes part of the room's performance. It makes conversations clearer. It makes recordings cleaner. It makes the environment more comfortable. And the most satisfying part is knowing that every detail has a reason behind it. Not just because it looks good. Because it works.
About the Author

Pedro Arian Viena
Maker & Acoustic Craftsman
Craftsman and home designer passionate about solid wood joinery, custom furniture fabrication, architectural built-ins, and local smart home automation. I write detailed guides on building beautiful, functional living spaces.